How to install Viber on PC without smartphone
As the most of the official resources claim, while you are installing Viber on PC, you first need to set it up on your Android-smartphone, iPhone or iPad gadget and activate the phone number from the mobile app. That is the obligatory precondition you need to complete before using the Viber messaging service on laptop or stationary desktop computer. But what if we still don’t have a smartphone powerful enough for essential Viber operations on it but have a notebook or PC that can run dozens of apps in multitasking mode instead? Indeed, with a little tricky customization and hints, we can install and run Viber on PC even without smartphone in our ownership if we make preparations that will be described further in this article.
Preconditions for using Viber without mobile device
Before you operate with the procedure, you need to follow some basic steps, like creating an email account or registering within special service. Here are the preconditions you need to complete before using Viber without smartphone in hands:
- valid Google account.
- A valid phone number. You need to have a registered operational SIM card on any phone, even without Android or any other mobile OS installed.
- An Android virtual machine. In our case, we use BlueStacks, but you can run any same-targeted software, like Genymotion, Nox Player, MEmu or any other tool you know. Some of them work only on Windows, while other splendidly operate on macOS as well.
The procedure of setting up Viber on PC without Android phone
Here’s how it works: we are going to activate a valid mobile number within BlueStacks to make Viber work in virtual Android environment, and after that installation, the messenger will start working. The procedure is as follows:
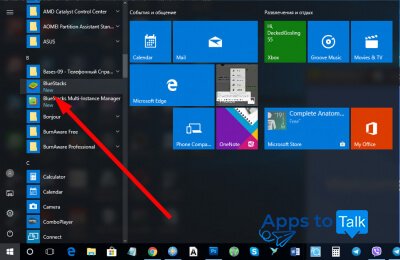
- The first step is to download BlueStacks emulator from the official website and complete the installation routine. This tool is being installed like any other program tool, so you shouldn’t encounter any difficulties.
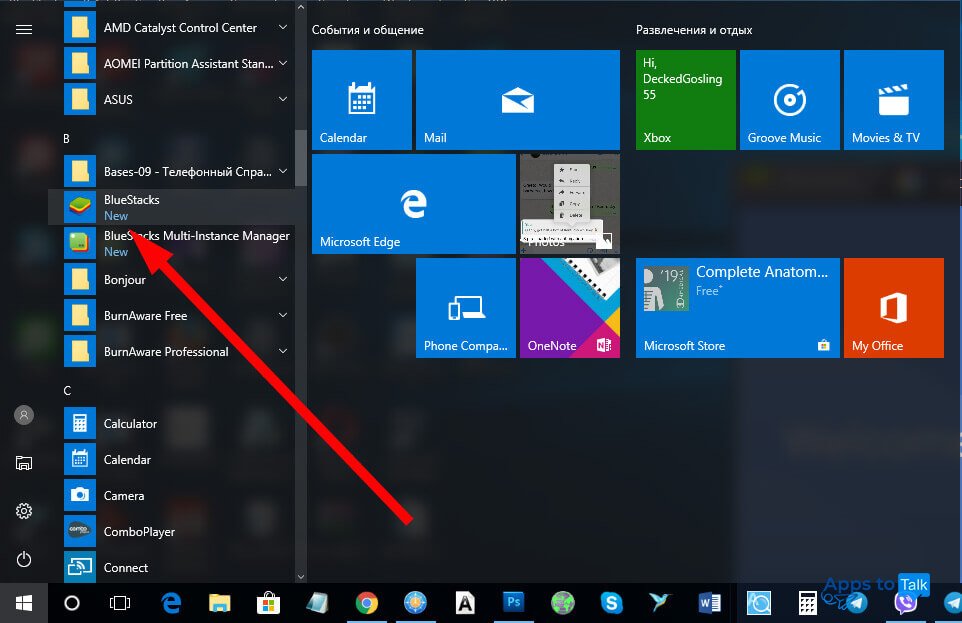
- After the program is successfully installed, run the application by clicking the BlueStacks shortcut from the Start menu or Dock panel within your Windows or macOS environment respectively.
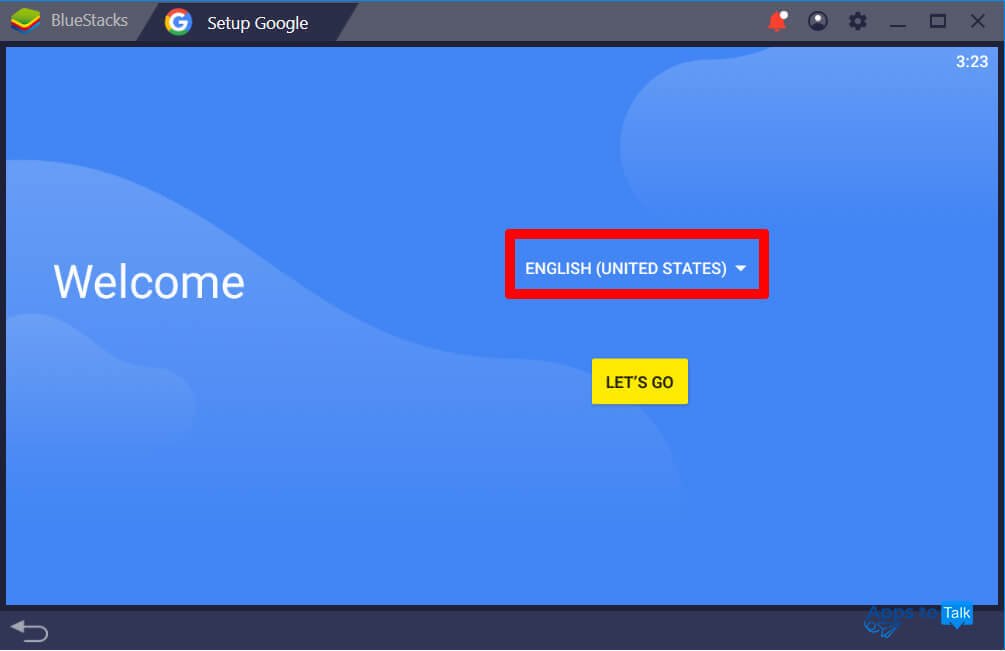
- After BlueStacks engine is initialized and ready for all essential operations, the time comes to make a bit of former setting up before getting to work. On the Welcome screen, choose the language which you want to be used within your Android instance. In our case, it is English, while you are free to choose your native language.
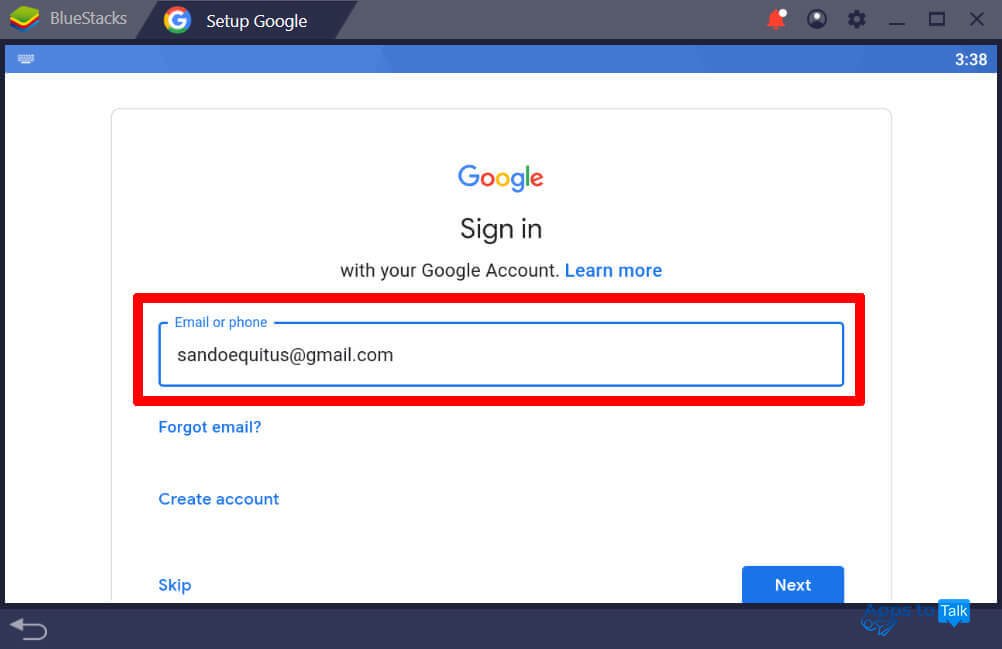
- The next iteration refers to logging in to your Google account. This is an obligatory stage of setting up the Android version, as your Google email should be registered in this specific type of operating system. Type in your valid Google email in the text box in the center.
- On the next form, specify the password for your Google account. If you don’t remember it, click on “Forgot password?” field and make the changing of password procedure started. It is as simple as on any other email accounts, and will require providing some details, like an alternate email or linked phone number. You will receive an SMS with a request code to type in into the proper field in order to change the password. After the correct password is typed in, click the Next button.

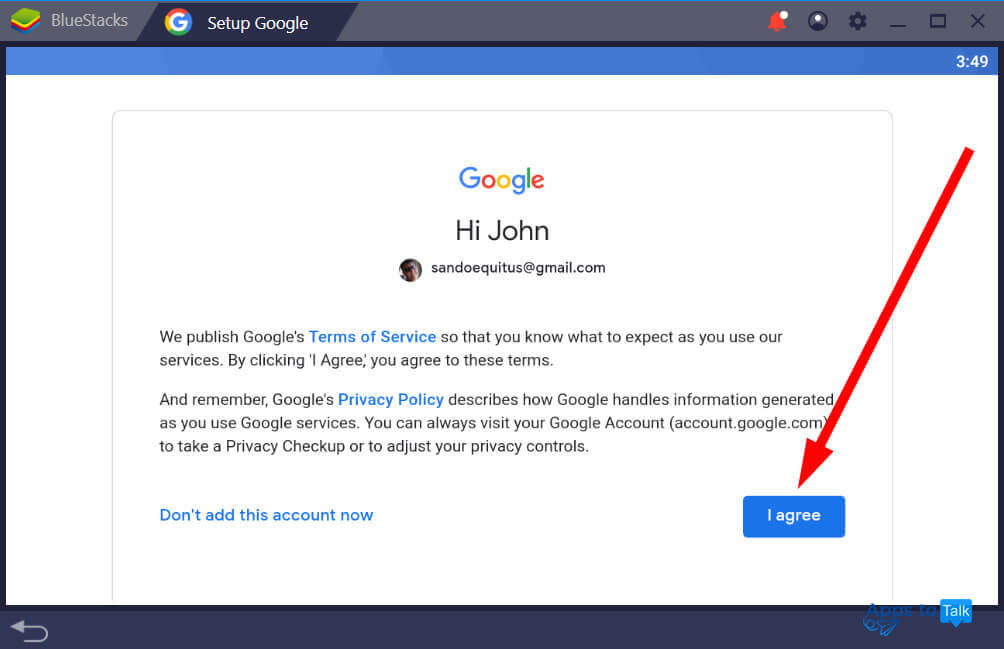
- The further iteration is related to agreement with Google’s terms of service and privacy policy. This step doesn’t require any in-depth involvement from our side, so just click the “I agree” button, and let’s get to the main things.
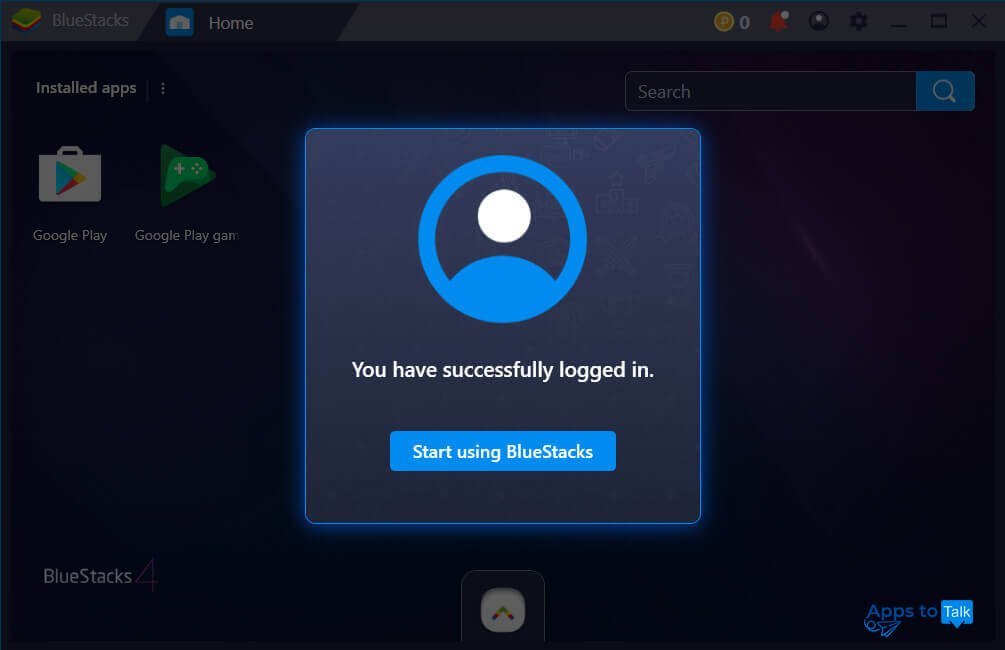
- Once when the authentication is completed, you will see the corresponding info message. The preparation stage was successful, and we can move on to the setting up.
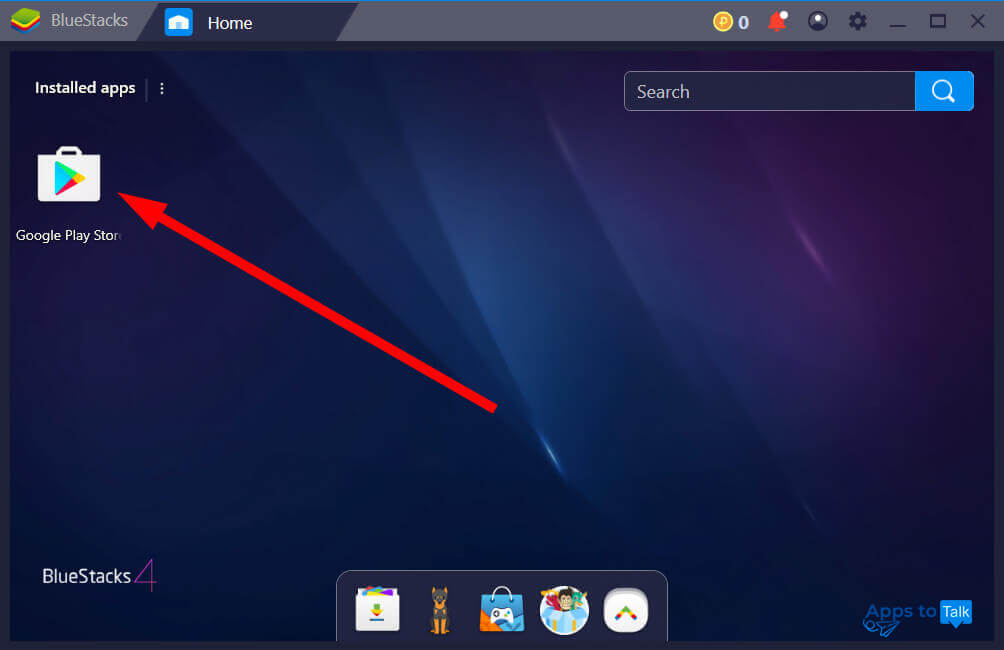
- At last, we logged in to Android. Now click on Google Play store icon to get access to the mobile apps market.
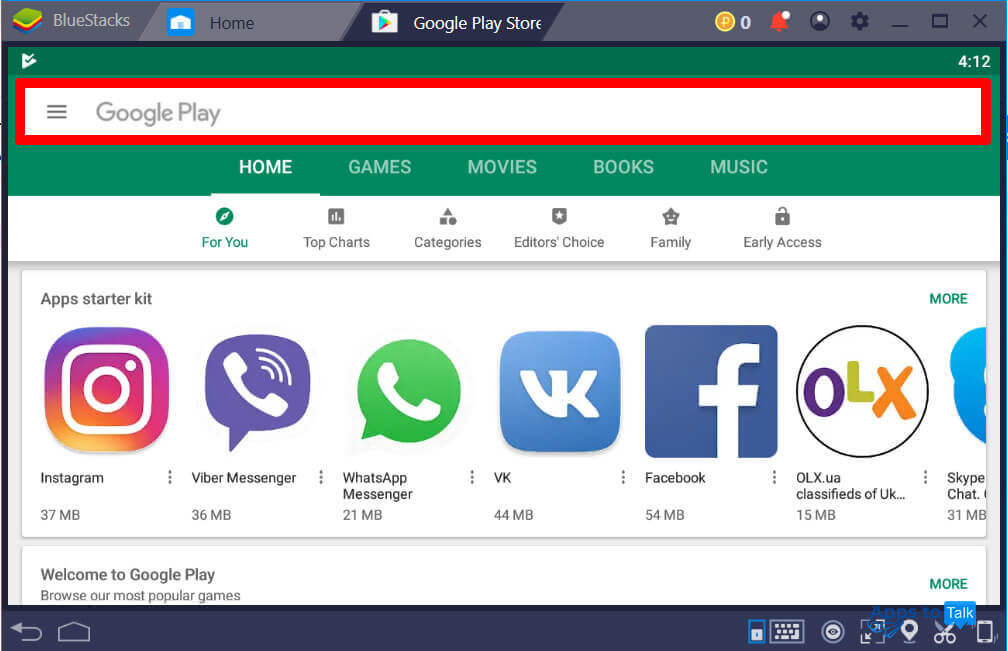
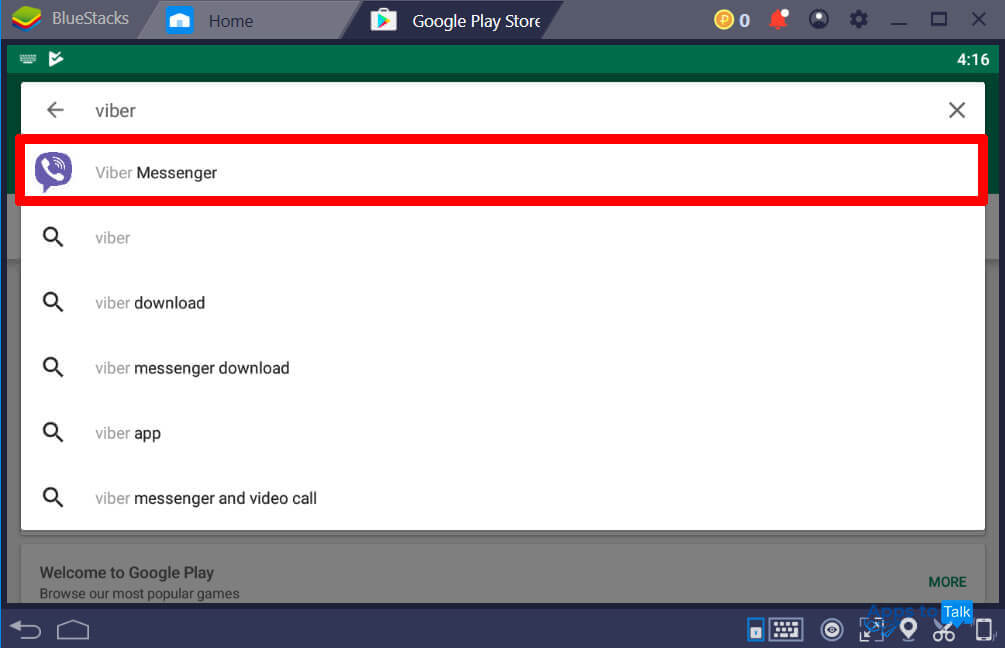
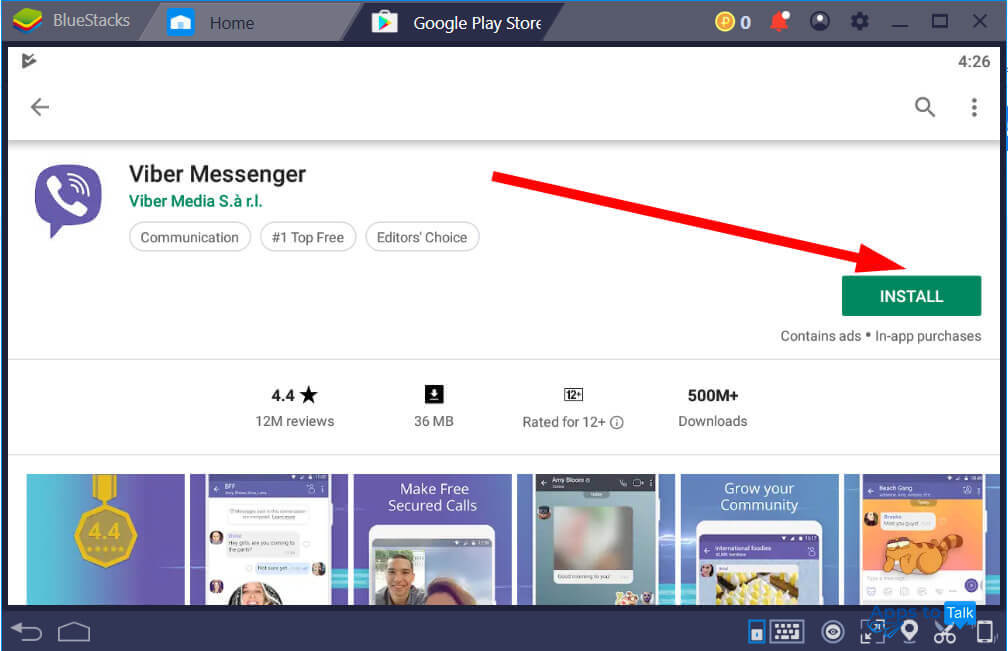
- In the Search field above, type in “Viber” word to find the app page in the market.
- When the messaging service is found, pick the corresponding item from the pop-up list.
- Let’s begin the most important thing — the setting up! Hereby, click on the Install button on the Viber page in Google Play store to start the installation routine.
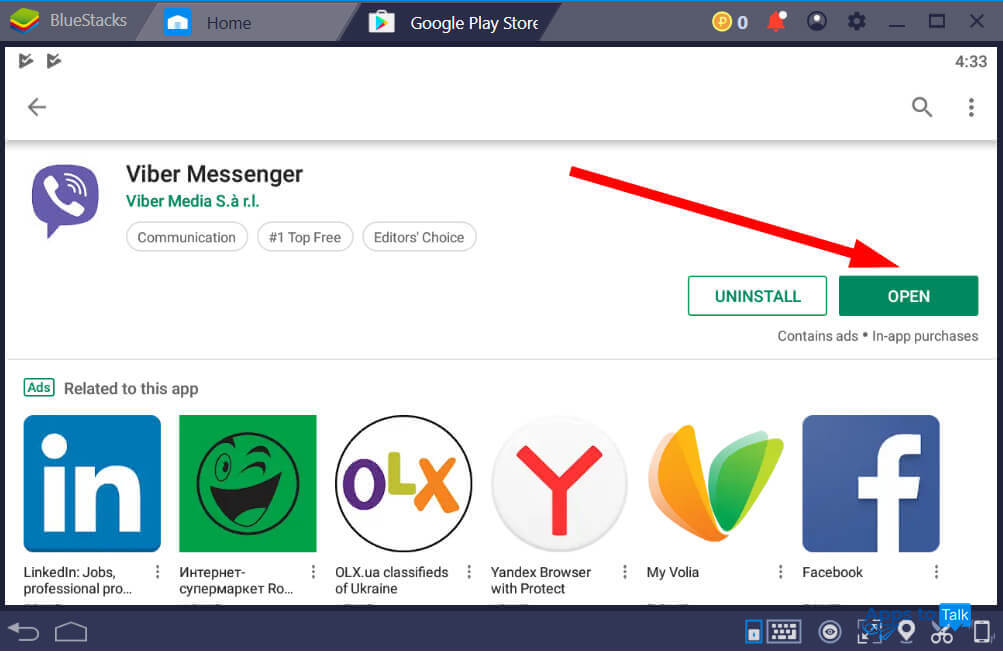
- Wait a few seconds until all the files are downloaded from the store and installed to your Android instance within BlueStacks. When the app is ready, click on Open button or run the Viber app from the home screen via a click on the relevant icon.
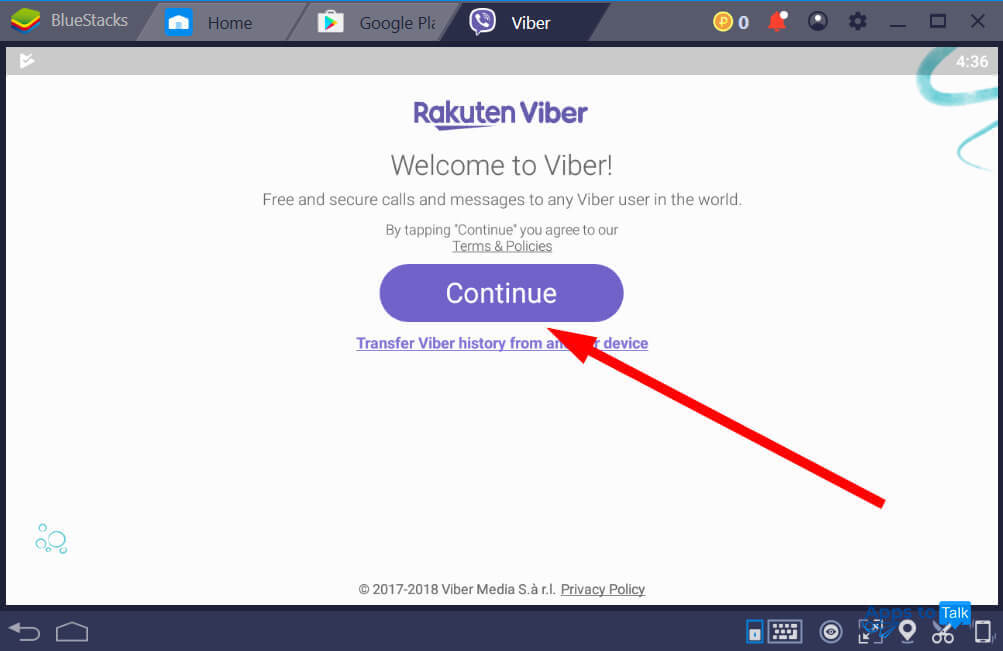
- On the next form, you will see a Viber welcome message. Just click Continue to go further.
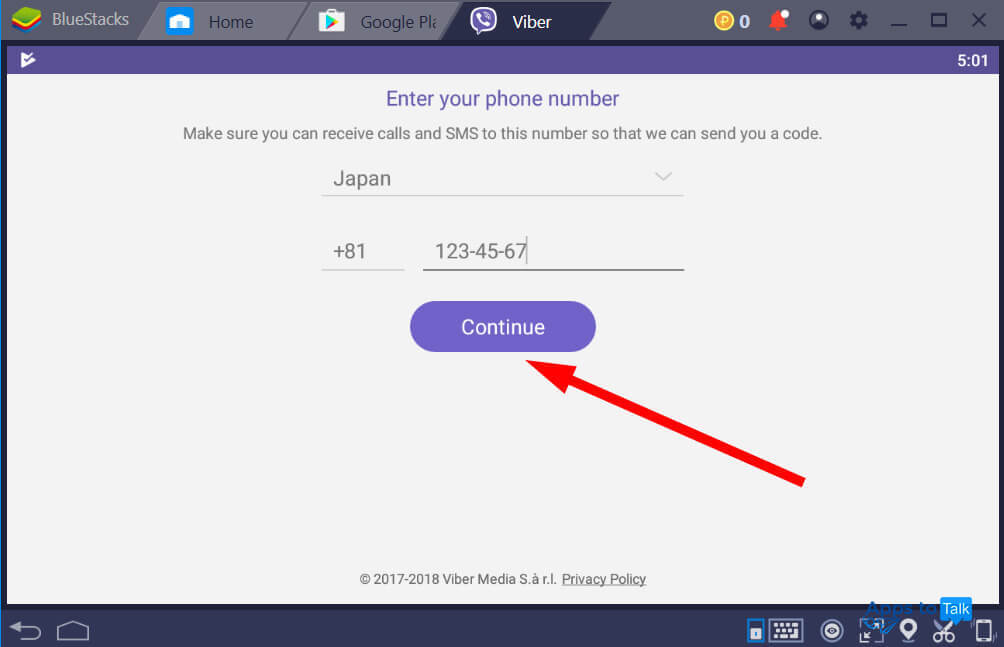
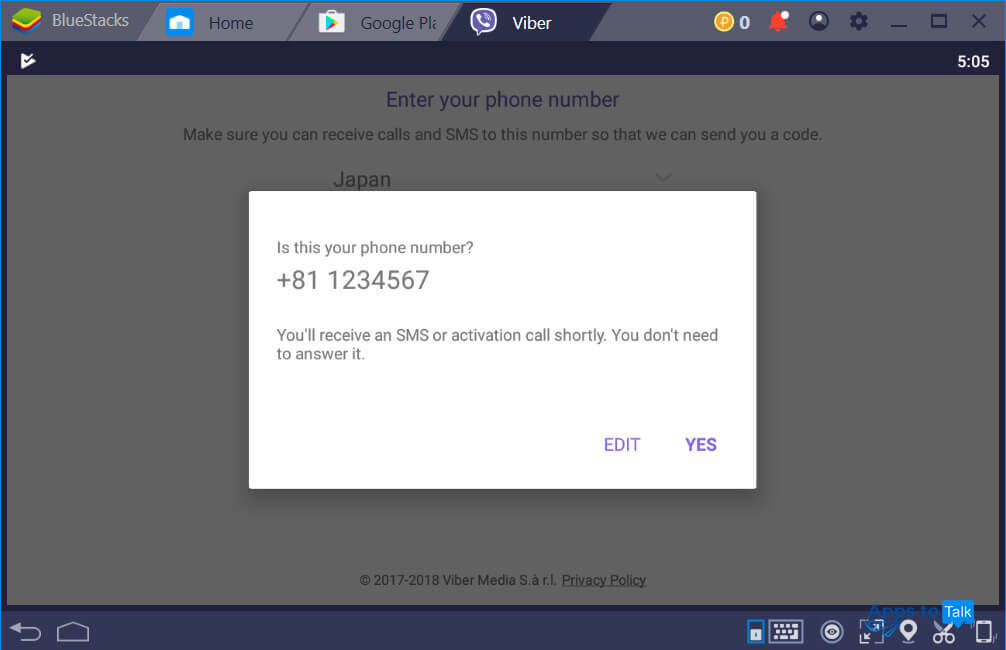
- On the new form displayed, specify the code of your actual country of residence and the valid phone number for Viber activation. After the data is provided, click Continue to proceed the registration process.
- After that, the confirmation box appears. If the data you entered is fully correct, click the Yes button. If otherwise, choose Edit.
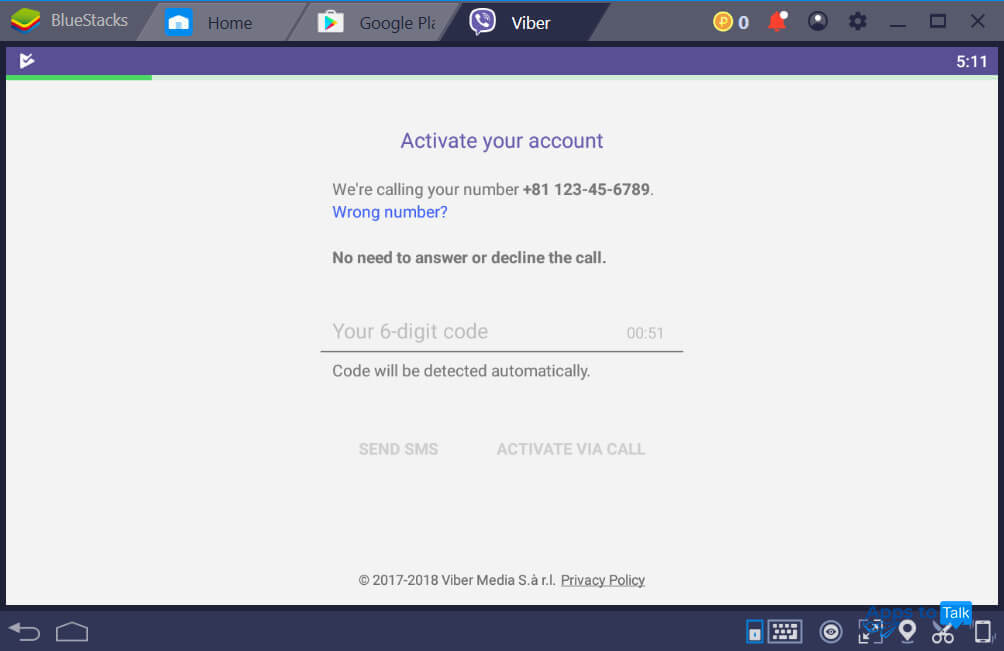
- Here goes the approval of the number by the server. Now you will receive an incoming call. There is no need to accept or decline the call, just wait a bit until you receive an SMS with the 6-digit code. Type it in into the blank spaces or it will be filled in automatically, and we are on the way to completion.
- When the code received via SMS message or call is entered, all the rest is just a matter of simplicity. Complete the rest of the routine just like an ordinary mobile Viber installation.


When it’s all entirely completed, you can get started with the installation of the desktop Viber. Indeed, after we registered and activated a number for mobile phone in Android emulator (i.e., BlueStacks), everything that is left to do is to go to the Viber for PC page or to the official web portal, download the desktop setup package from there and install it just like a simple setup file for PC, until the step related to your QR code scanning via phone or laptop. Let’s handle this:
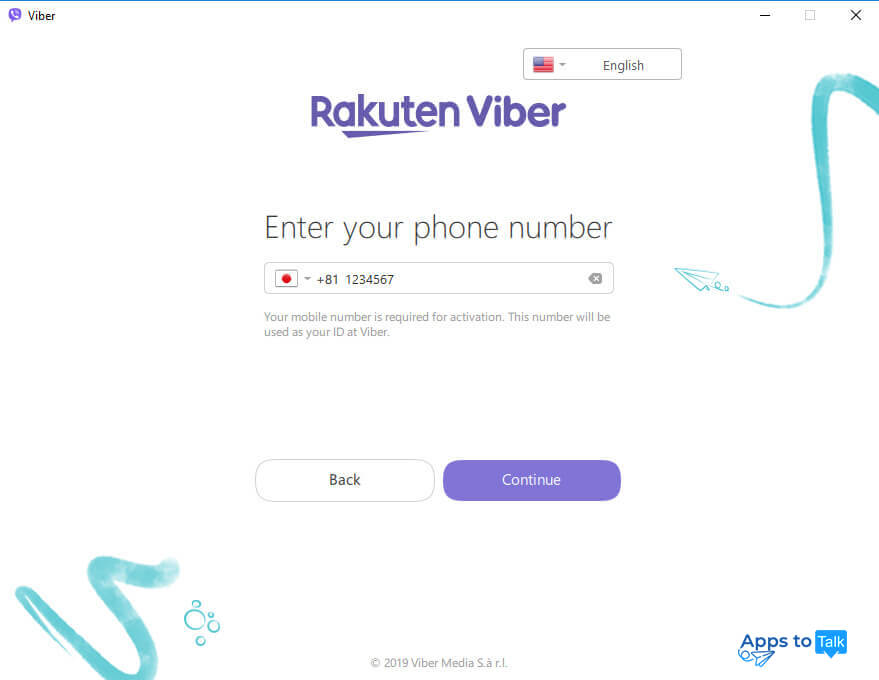
- On the first form, when you are asked about the mobile phone available in your own property, choose Yes, because we already registered Viber in BlueStacks.

- In the next window, type in the phone number which we have just registered in the Android virtual machine.
- Further setup phase suggests to scan the QR code displayed on the screen with our mobile gadget. Now click on “My camera is not working. What can I do?” text field below.
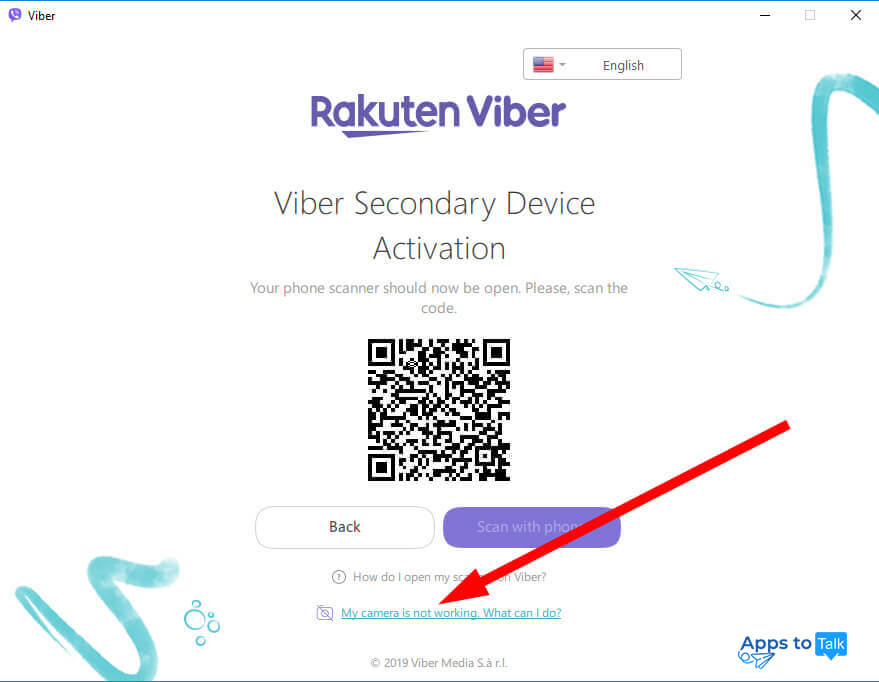
- After the previously specified field is clicked, you will obtain a long code that contains uppercase and lowercase symbols, digits and punctuation marks. Copy this sequence into clipboard by pressing the Copy button.
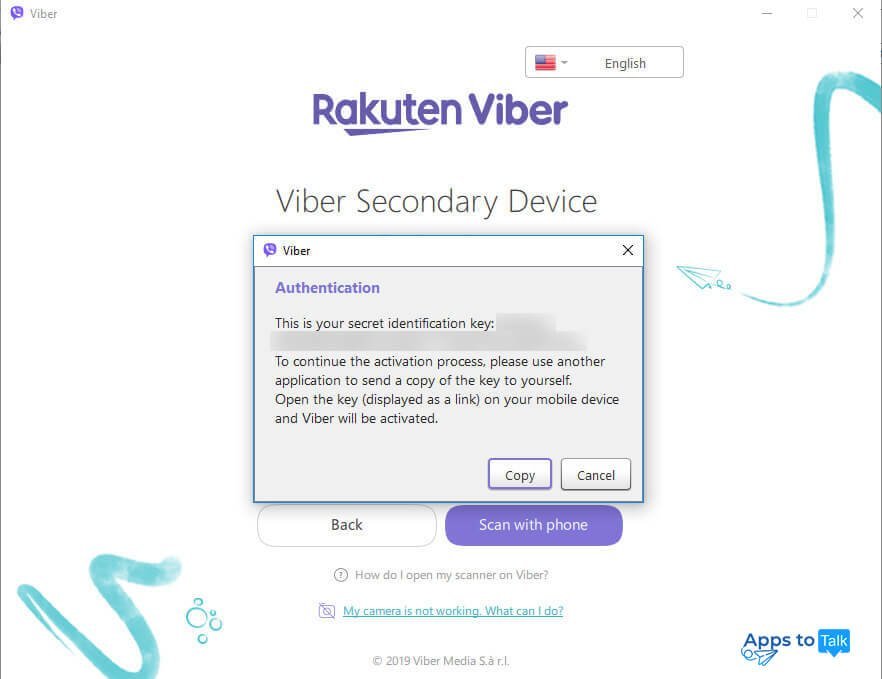
- Now it’s time to switch back to our BlueStacks. Install any alternate browser, like Firefox, Opera, Opera Mini or Yandex Browser and paste the code sequence copied from the Viber clipboard onto the address bar on the top section of the primary form of the app, which you have chosen to install. After the combination of the symbols is pasted, press the Enter button.


Note: as a matter of fact, this method should also work in Chrome browser available in BlueStacks by default. But, as the experience shows, Chrome starts to search for the inserted line in the Google search engine, and this is not what we are supposed to do. The method was thoroughly tested on Firefox browser, and it works just fine there. All the alternate browsing solutions suggested behave correctly as well.
- If everything has worked as it should, you will see the following mini-form in your BlueStacks emulator.
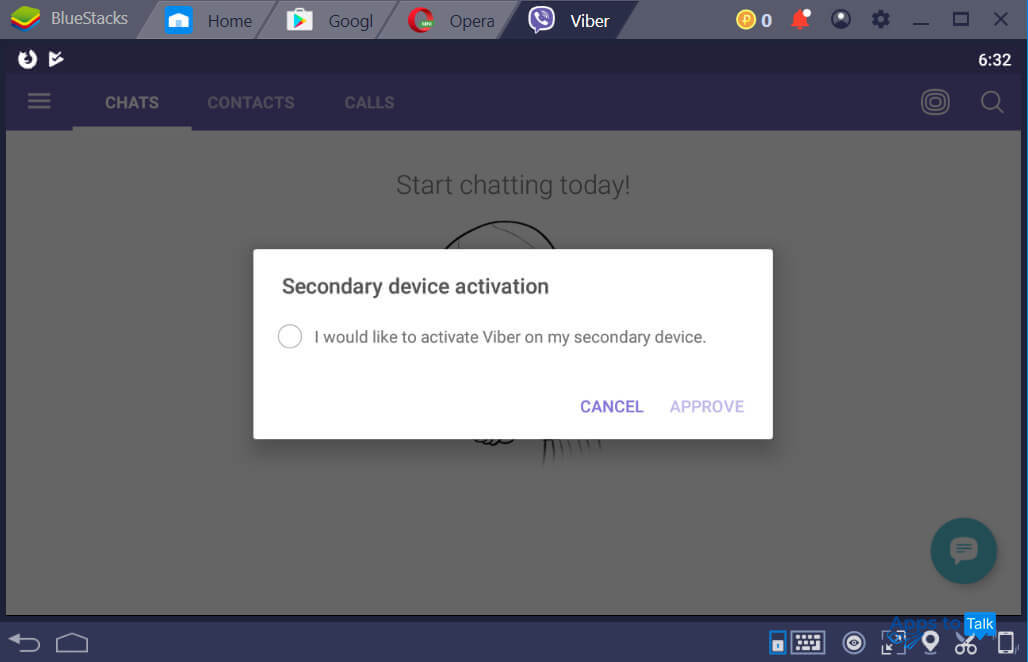
- Put the tick into the blank space and click on the Approve button to accomplish the Viber PC-build activation procedure.

- Afterwards, after you push the Approve button, your anticipation is fulfilled, and you gain a fully operation Viber instance working on PC as we planned to.


As you can see, it’s still possible to set up Viber for PC without powerful mobile gadget on Android, iOS or Windows Phone platform. The methods are not too hard to get accustomed to, and the basic workflow is absolutely intuitive and logical, indeed.
