How to use WhatsApp on Windows Phone
Among the other compliant platforms, Windows Phone follows the overall Windows 10 design and usability concept which is based on tiles usage, visual UI and general workflow of the operating system. WhatsApp is not an exception. The messenger works on Windows Phone just like a native tool, it has a similar setup, customization and usage. In this user guide, we will describe how to set up WhatsApp on Windows Phone OS, perform video and audio calls, use text chats, voice and video calls, change background color, make group chats, etc.
How to install WhatsApp on Windows Phone?
The way to add WhatsApp to the list of installed products is absolutely simple. Here is what you should do:
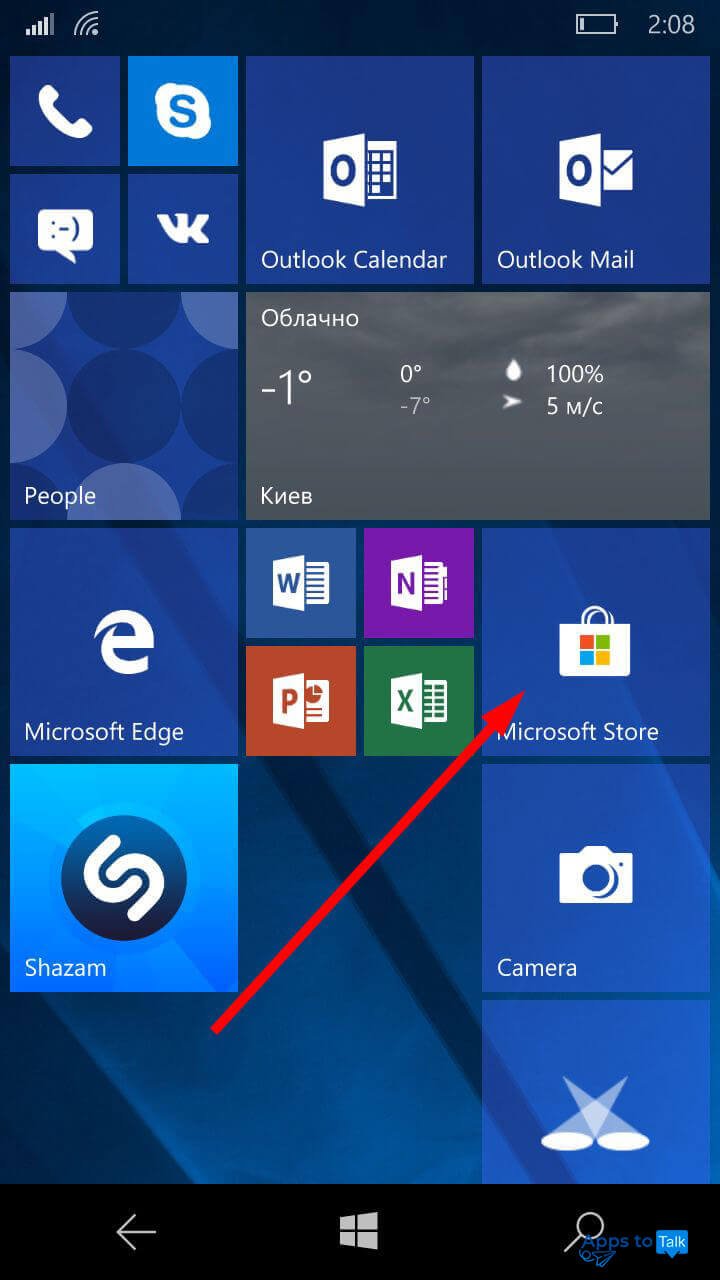
- Tap on the Windows Store tile on the home screen of your UI.
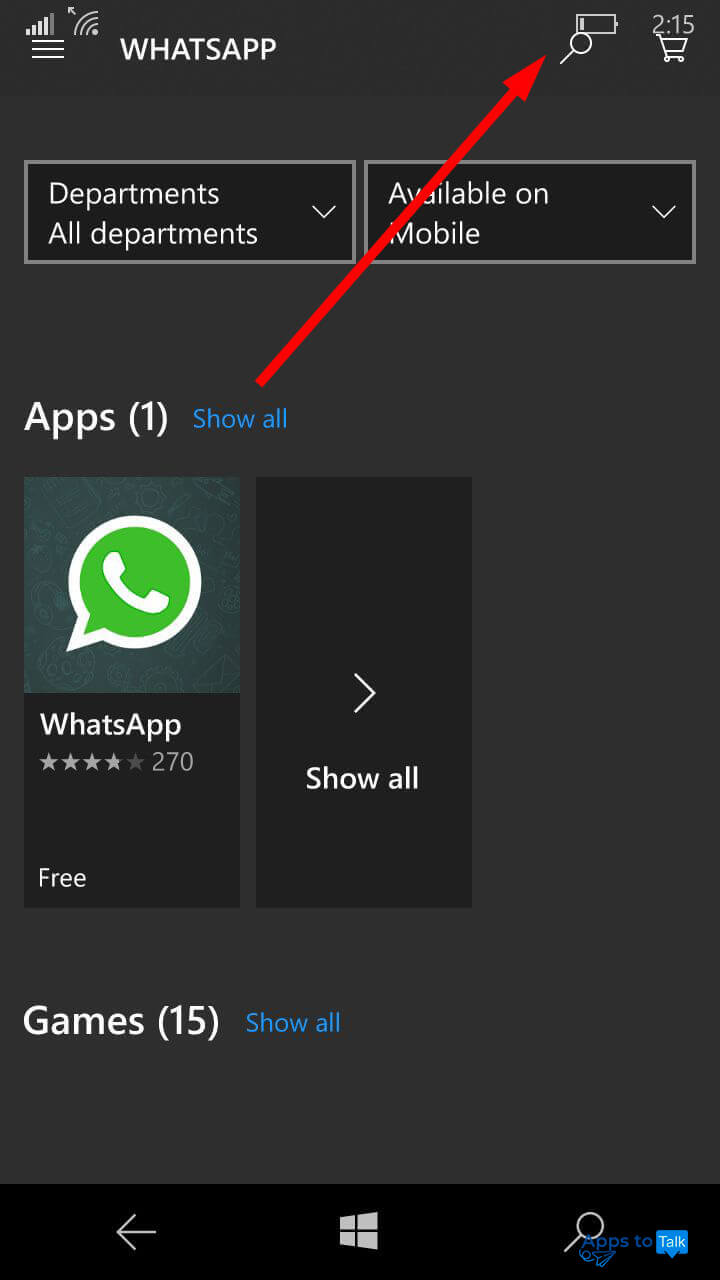
- Tap on the magnifier tool at the upper-right corner of the screen in order to initiate the search.
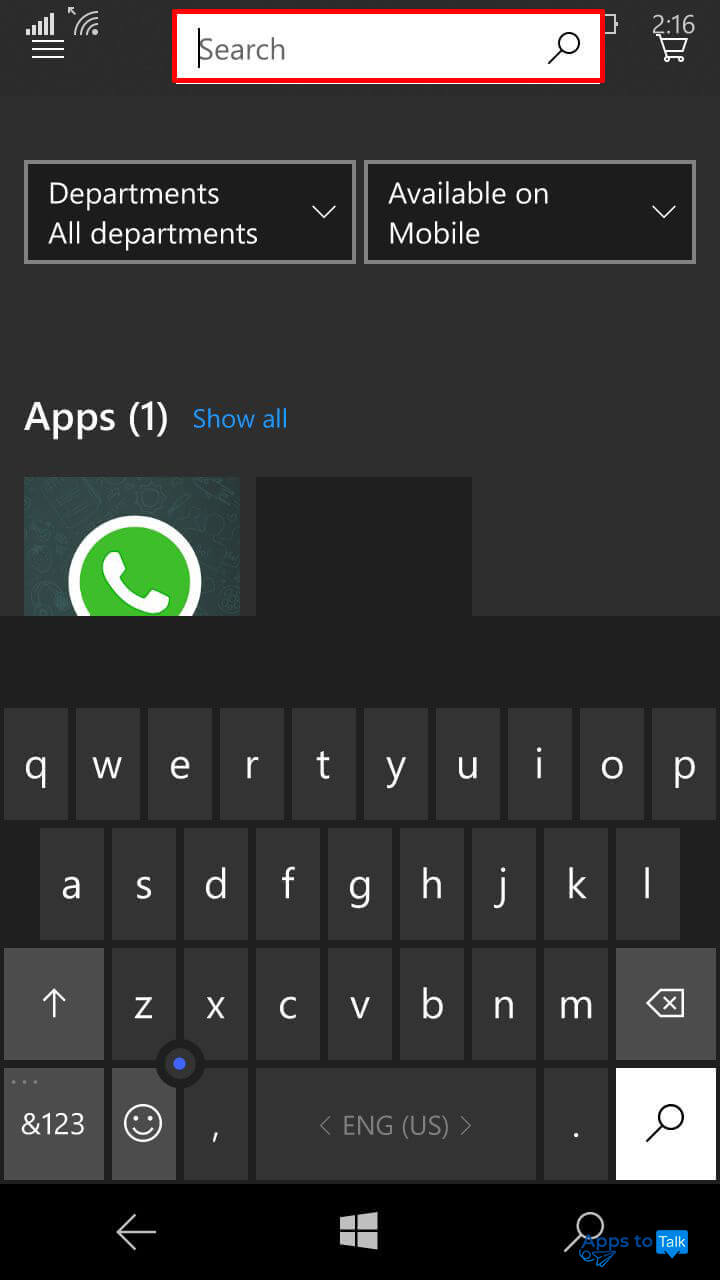
- In the Search text field, type the name of the messaging service you want to install.
- When the app is found, click on the Get button to start the downloading process. Check whether you have Wi-Fi network or the cell operator traffic available for downloading on your Windows Phone gadget.

- When the application is downloaded, click on the Install button to start the installation routine of the messaging tool right onto your memory storage.

- The first panel you see after initiating the installation phase is an offer to add your Microsoft account to the Microsoft Store if you still haven’t done it before. Just type your Microsoft email, phone number or Skype account which you want to use on your WinPhone into the text field.


If you don’t have Microsoft account yet, click on the Create one! message below the text field and follow the instructions on the screen.

This is not obligatory, but suggested so that your user experience would be easy while accessing the other Windows Phone mobile programs in the future. Let’s assume that you have successfully created your Microsoft account and typed it into the needed field. What’s next?
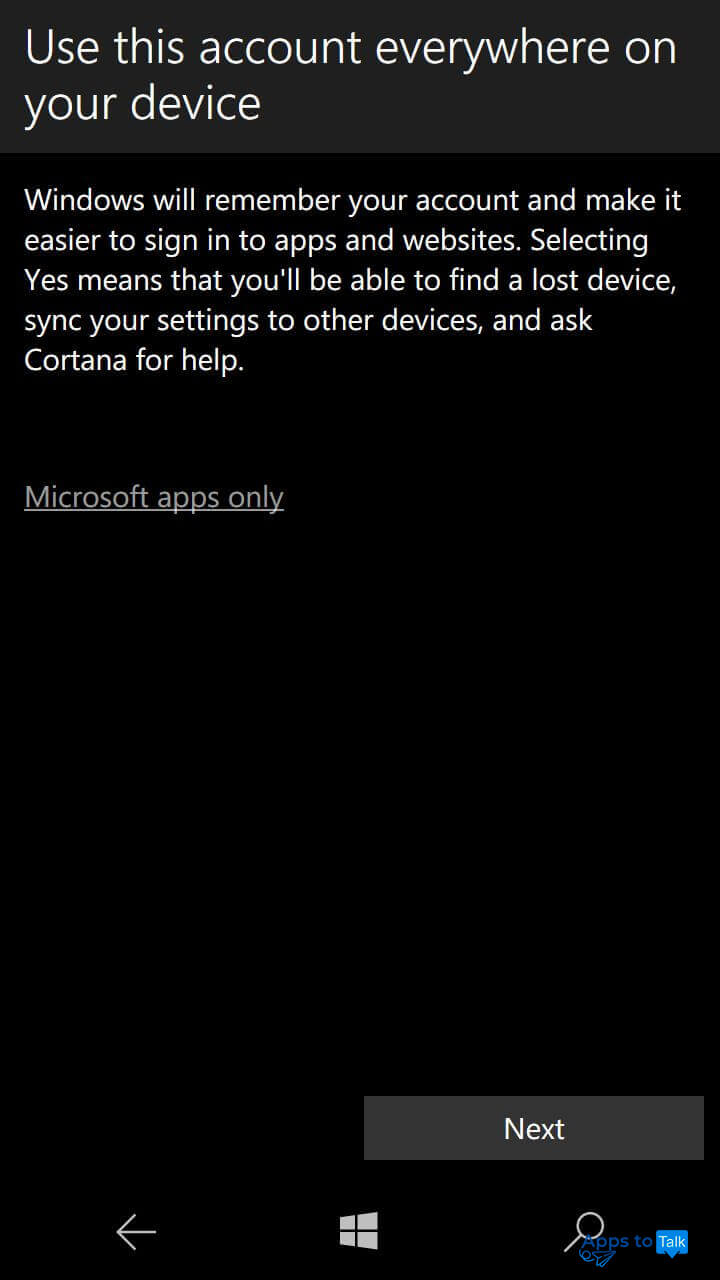
- On the further steps, you are offered to write down the password for your Microsoft account and approve the data typed in before. Remember that this account will be used for syncing all your settings with other devices based on Windows platform which gives you a chance to find a lost device and request for help from Cortana assistant.
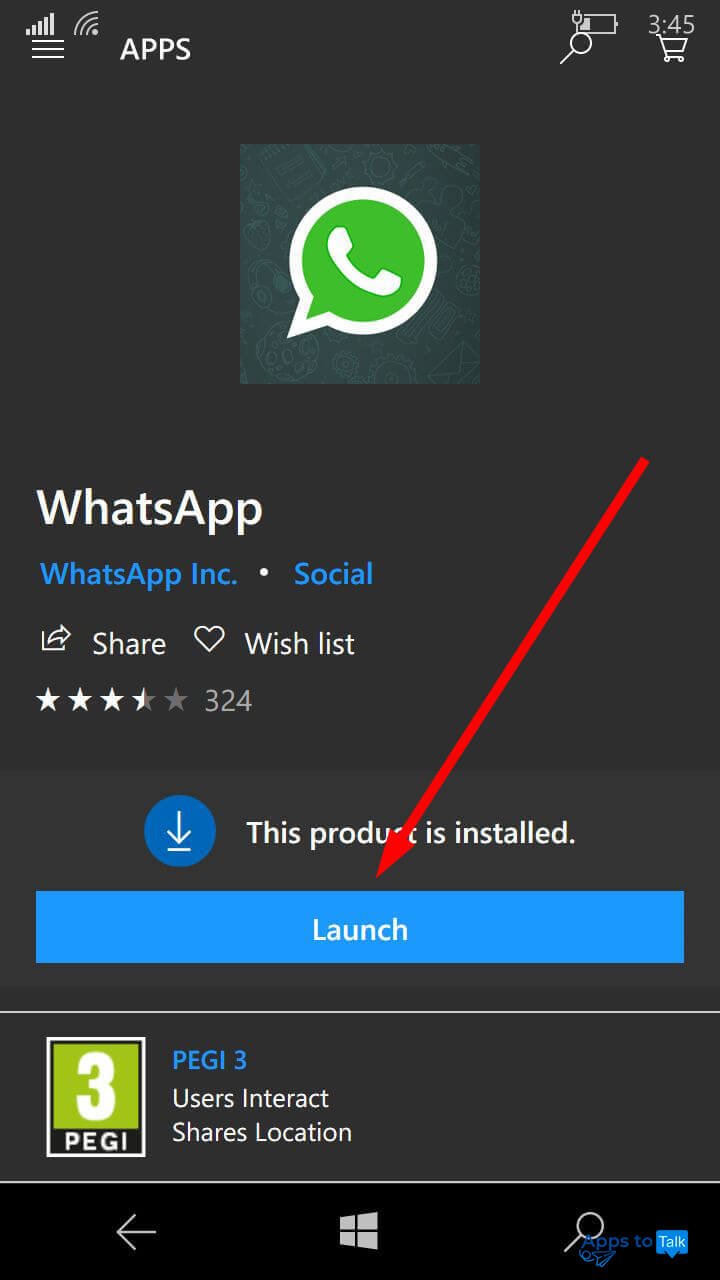
- The next step is the installation itself. Wait until it is fully completed, and after that the Install button is replaced with Launch. You can access the tool right from the apps list by selecting WhatsApp item or by pinning the icon right to the Start panel. At last, the utility is installed. Load it by clicking Launch.


If you still have some questions left after this guide, make sure you’ve checked the “How to download WhatsApp” FAQ section (see the Windows Phone part).
How to complete the setup of WhatsApp on Windows Phone
When the WhatsApp installation routine is completed, you will have to make some preliminary setting up before the app can actually be used. These settings include the phone number verification, restoring the backup from a cloud or local storage, and adding your name and photo that will be shown to all of your contacts.
- When running the messenger for the first time, the first info panel that you will see is a suggestion to read the privacy policy and accept the terms of service usage. Let’s skip this step and move on by clicking the Agree and Continue button.

- Next phase is the number verification. This is working absolutely the same way as on the other platforms. You just need to write the valid phone number and select the country from the pop-up list. In a couple of seconds, you receive an SMS-message with the confirmation code which you need to type into the blank spaces displayed in the next window.

- You can restore the message history backup from the OneDrive cloud storage if you have used the same Microsoft account before. Check the server for an availability of backup by clicking the Yes button on the next window.

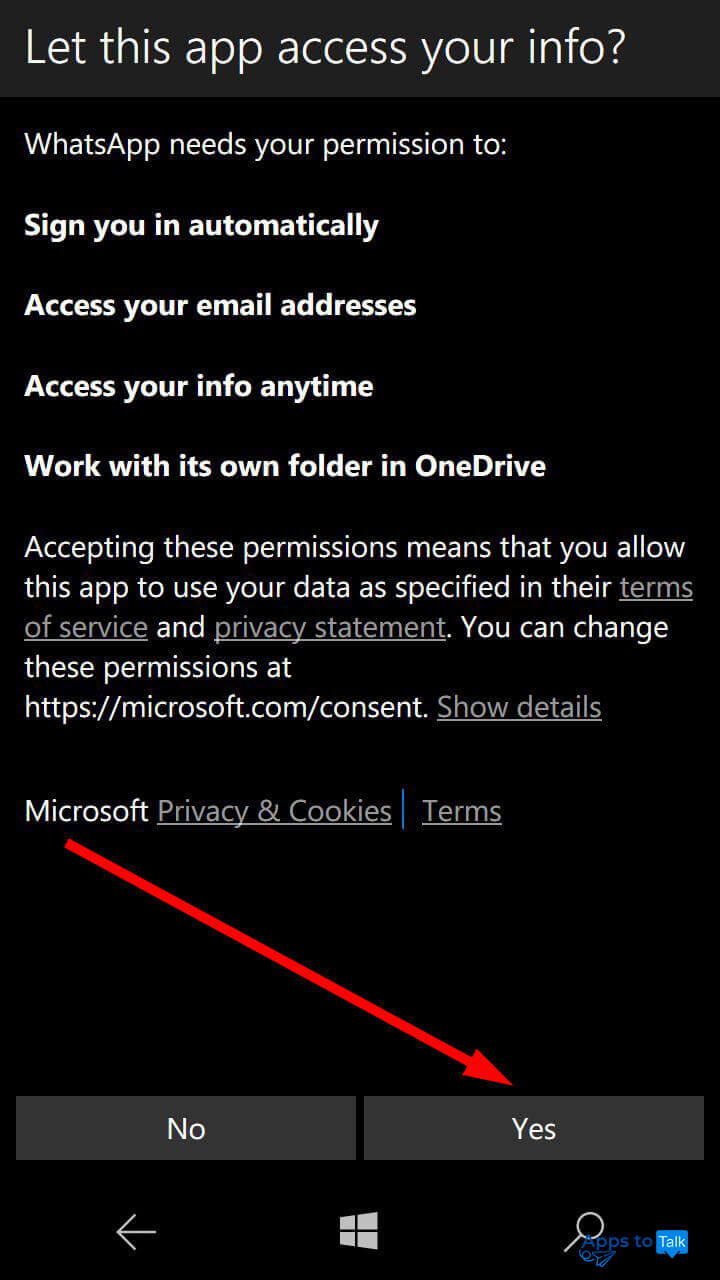
- In order to allow the program to connect to cloud server and access the available data from there, if there is any at all, we need to grant the appropriate permissions. Accept the granting permissions action via Yes field and navigate further.
- If backup is found, you will instantly see the corresponding message right on your gadget screen. If none of the backups is found, tap the No button and skip this step.

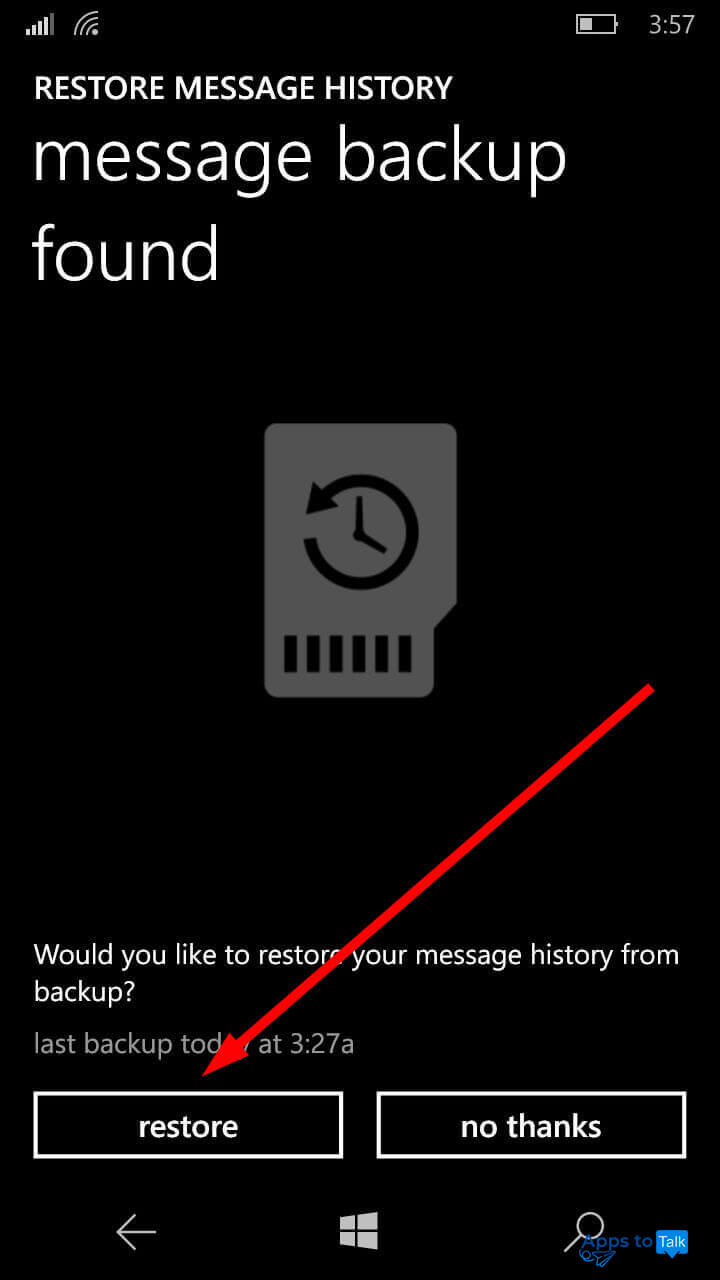
- We have another chance to restore the backup of the messages history, this time from the local memory and SD-card of your mobile device. Click the Restore button and let’s see if it works this time.
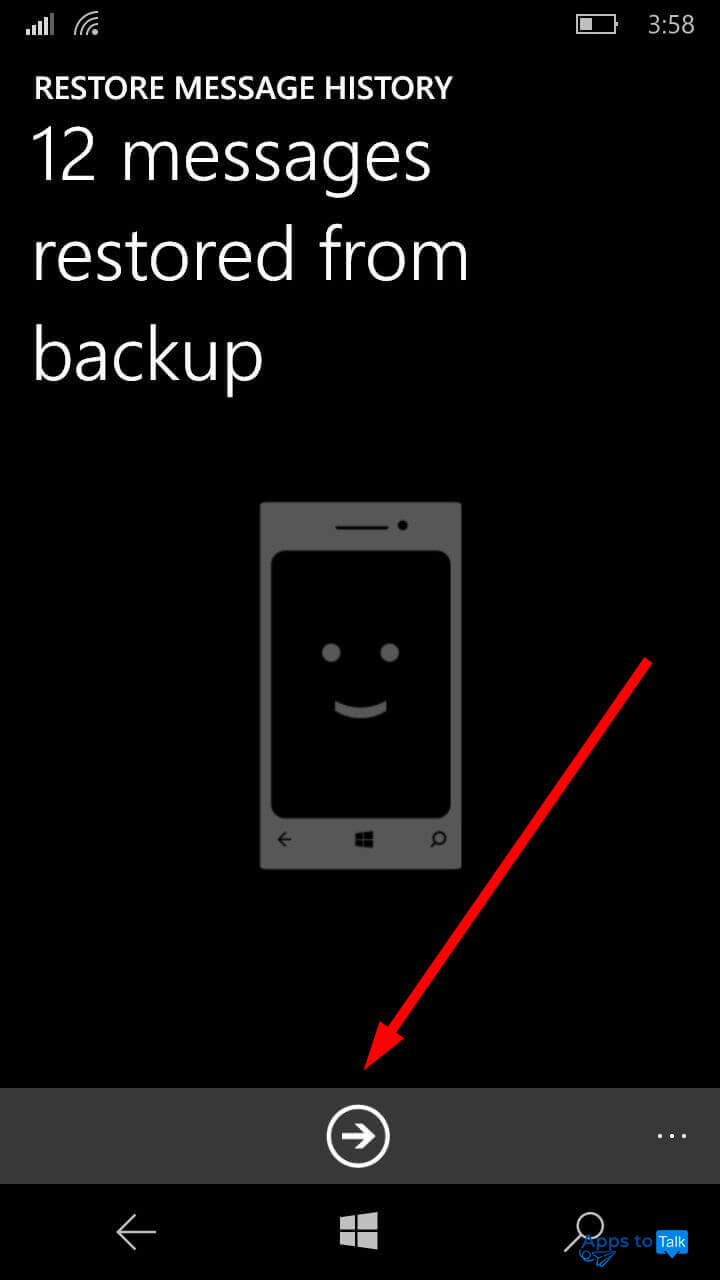
- If you have used WhatsApp on the same device formerly, the backup will be successfully restored, and you will instantly see the message about it. Make a brief glance on it and click the button with an arrow below in the middle to go on with the procedure.
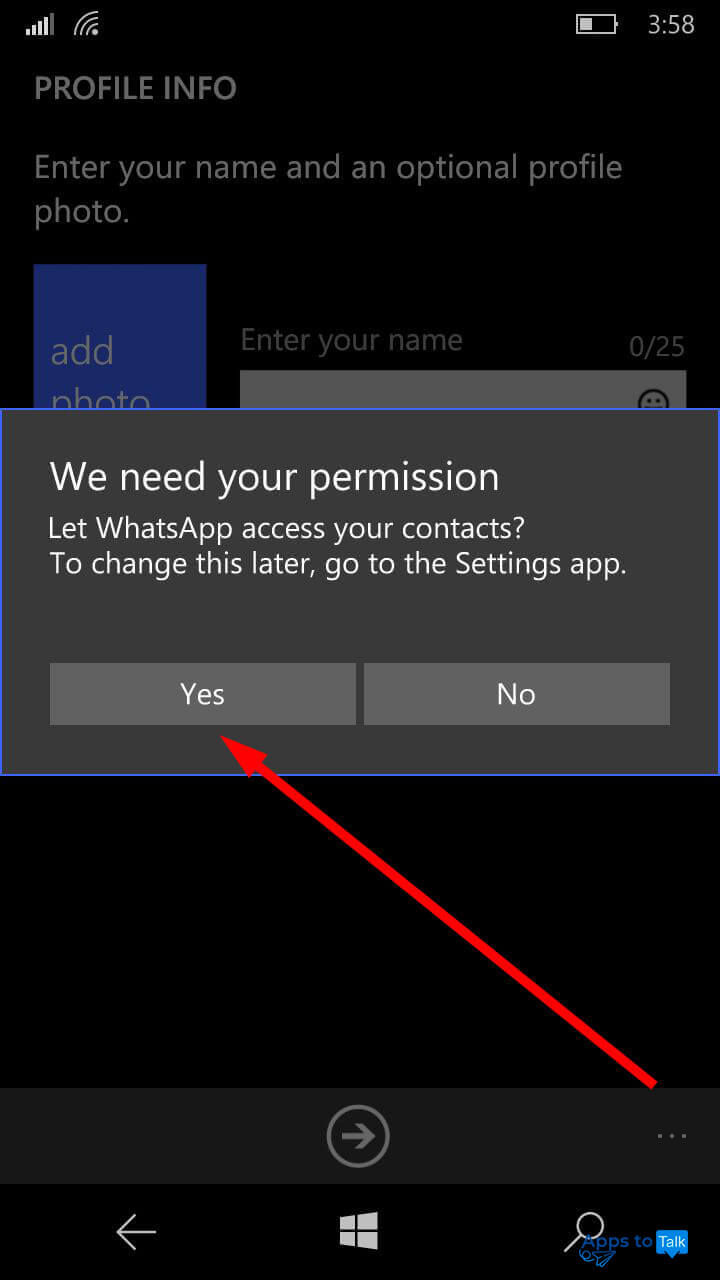
- Before the further customization is performed, you need to grant the permission to the app to access your contacts. Select the Yes option among the confirmation box variants and let’s proceed with the final setup stage.
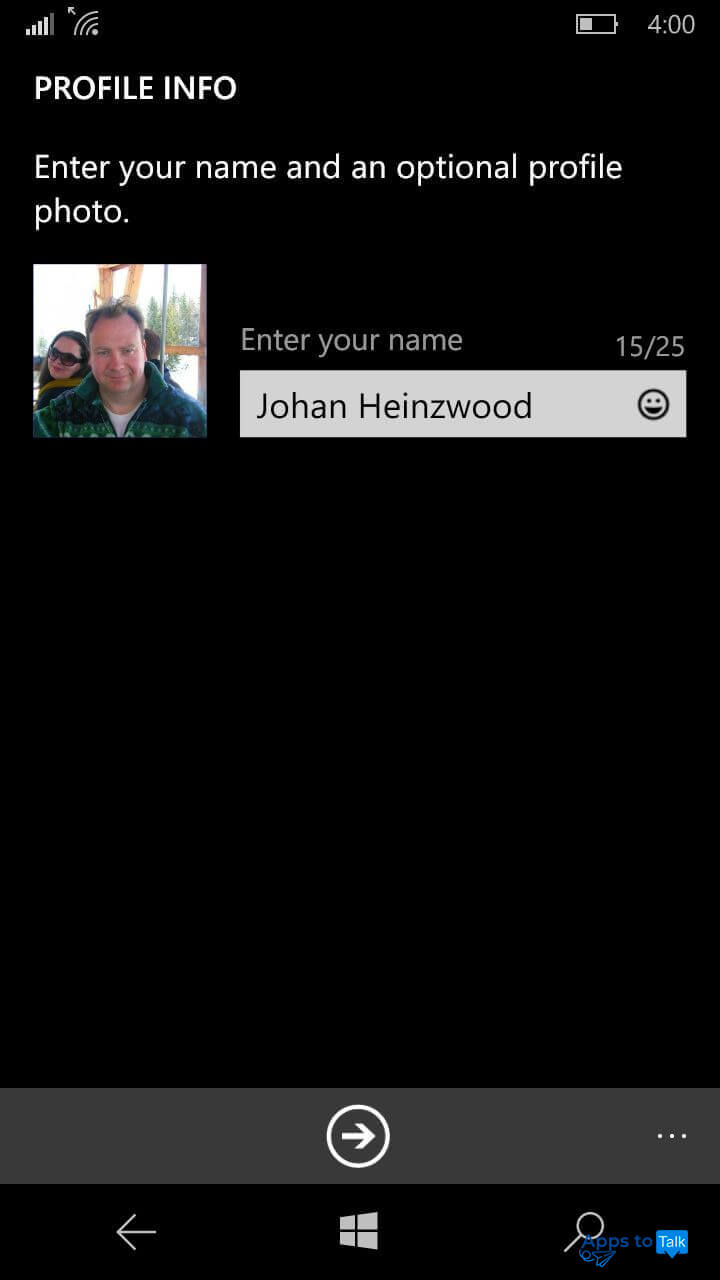
- On the last step, you are suggested to write your name and add the photo which will be visible to all of WhatsApp users. If you don’t want the personal info to be shared, pick a false name instead of real and add a suitable avatar instead of your personal photo. Just remember that when someone attempts to search you by name within WhatsApp database, they won’t be able to do it due to your false name.


How to start chatting on WhatsApp for Windows Phone
It is incredibly easy to start chatting on WhatsApp:
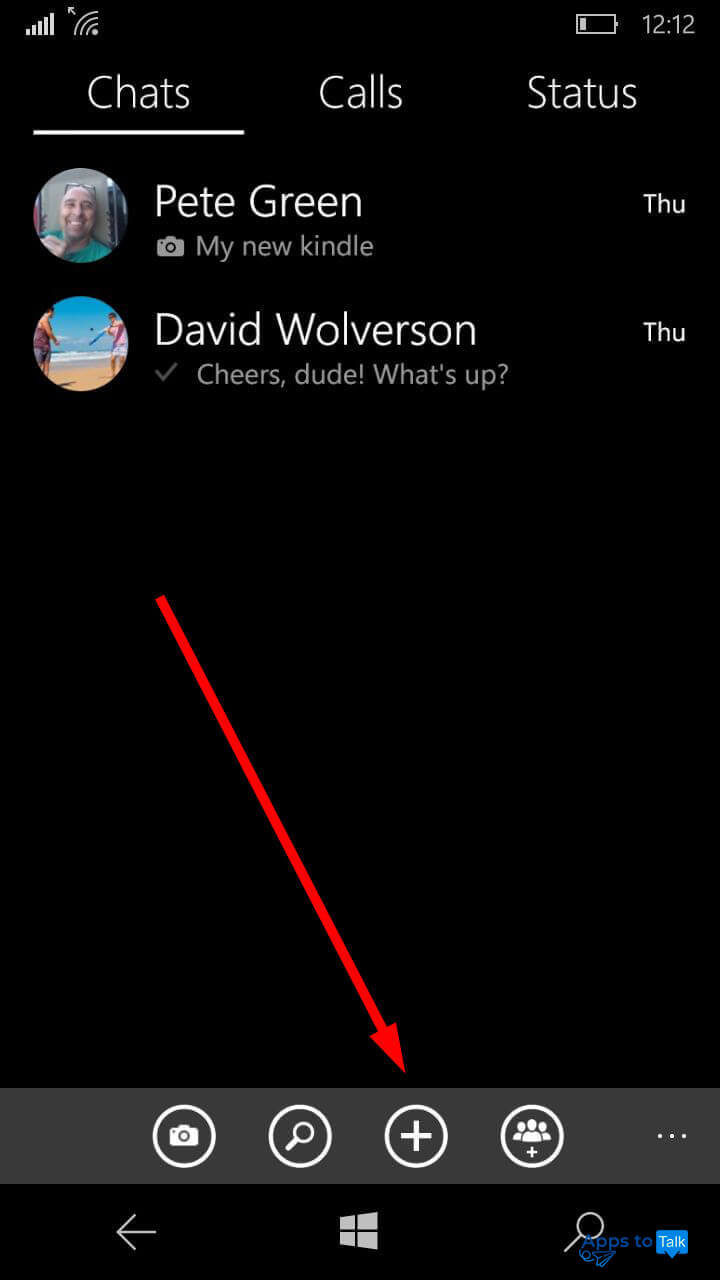
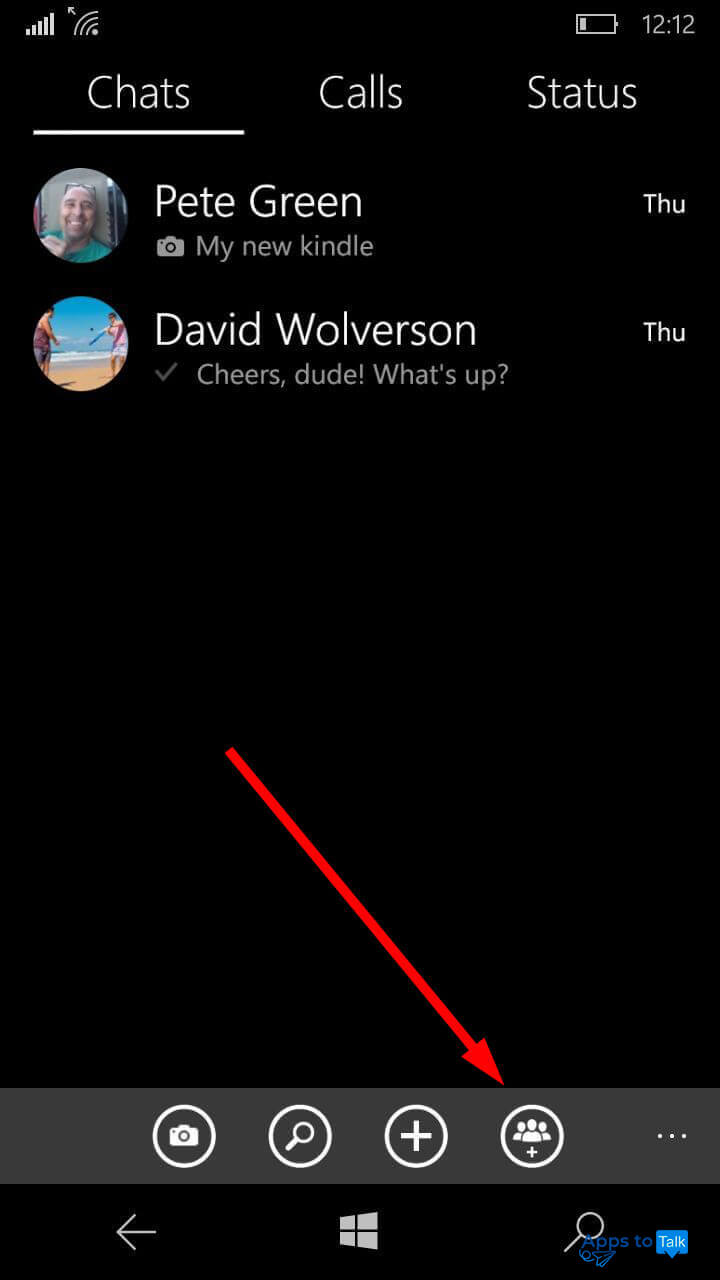
- Open WhatsApp and navigate to Chats tab. Here you can see the list of recent active chats which you arranged lately. Nevertheless, you can chat with a person who is not available in this list. In order to do that, tap + button on the lower icon panel.
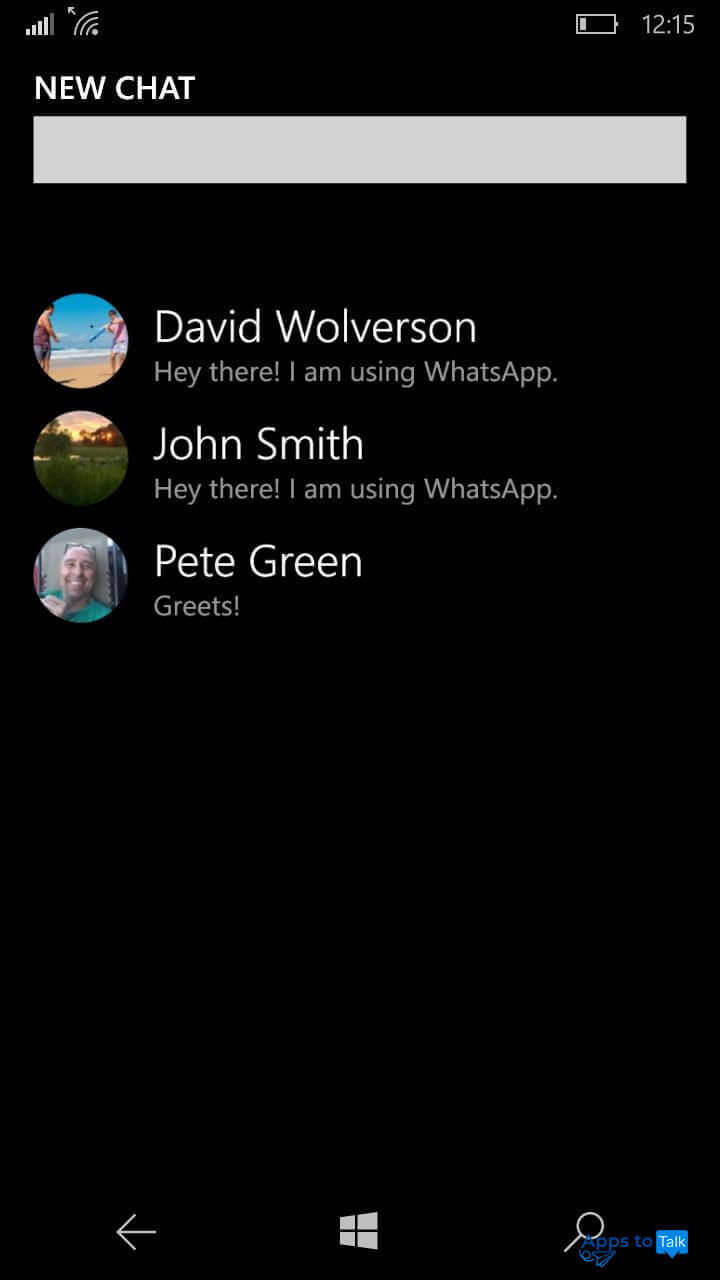
- After tapping, the list of all your contacts from the phone book who have WhatsApp on their mobile or desktop gadgets will appear. Select the needed one and text as much as you want.


How to arrange an audio/video chat with a contact on WhatsApp for Win Phone
Video/audio calls is a powerful feature created to enhance your user experience. Here is how you can organize an audio/video call on WhatsApp messaging tool:
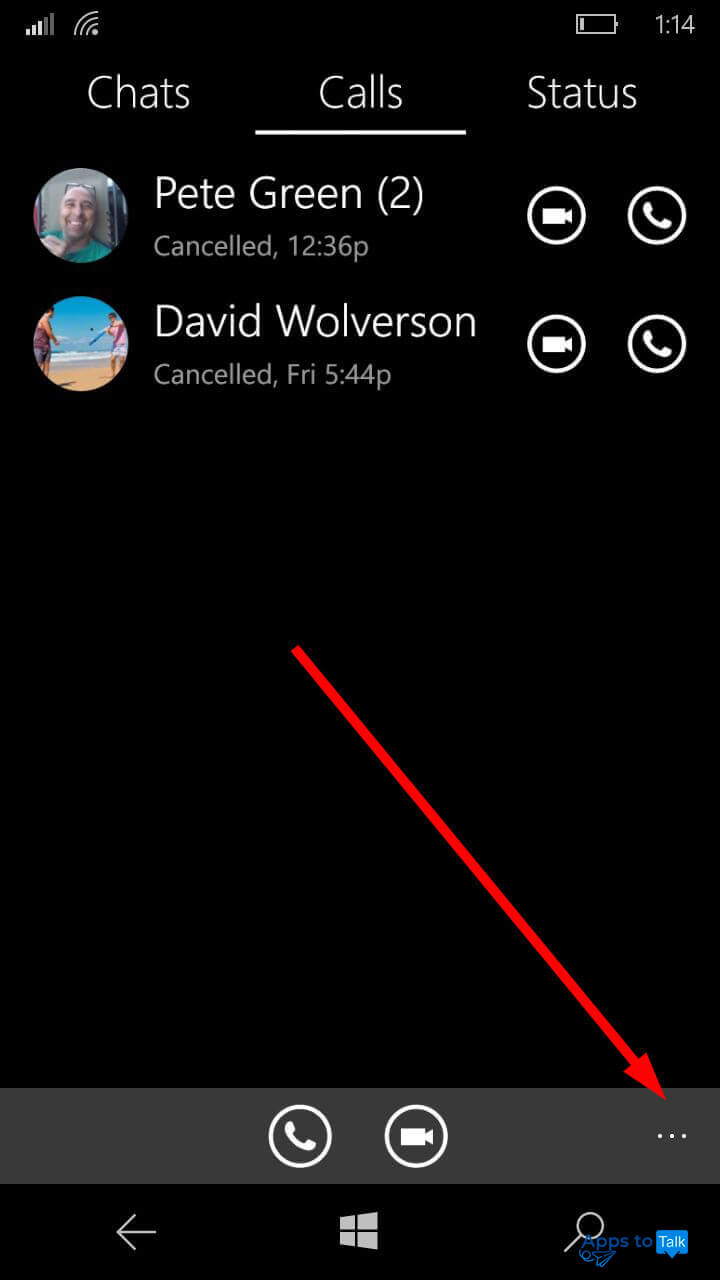
- Open WhatsApp and go to the Calls tab. By default, this tab reveals the list of recent calls from your mobile device to all of your contacts, either incoming or outcoming.
- On the Calls tab, click the appropriate button on the lower icon panel to initiate a media call, audio or video.
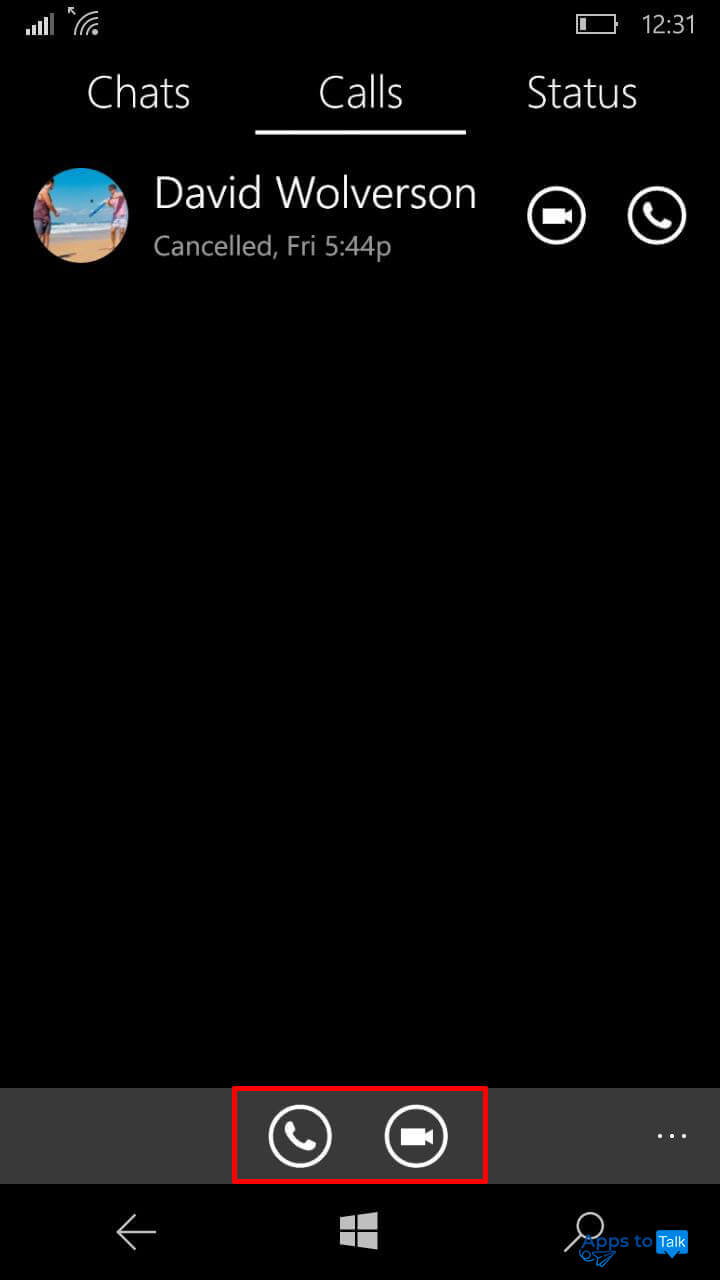
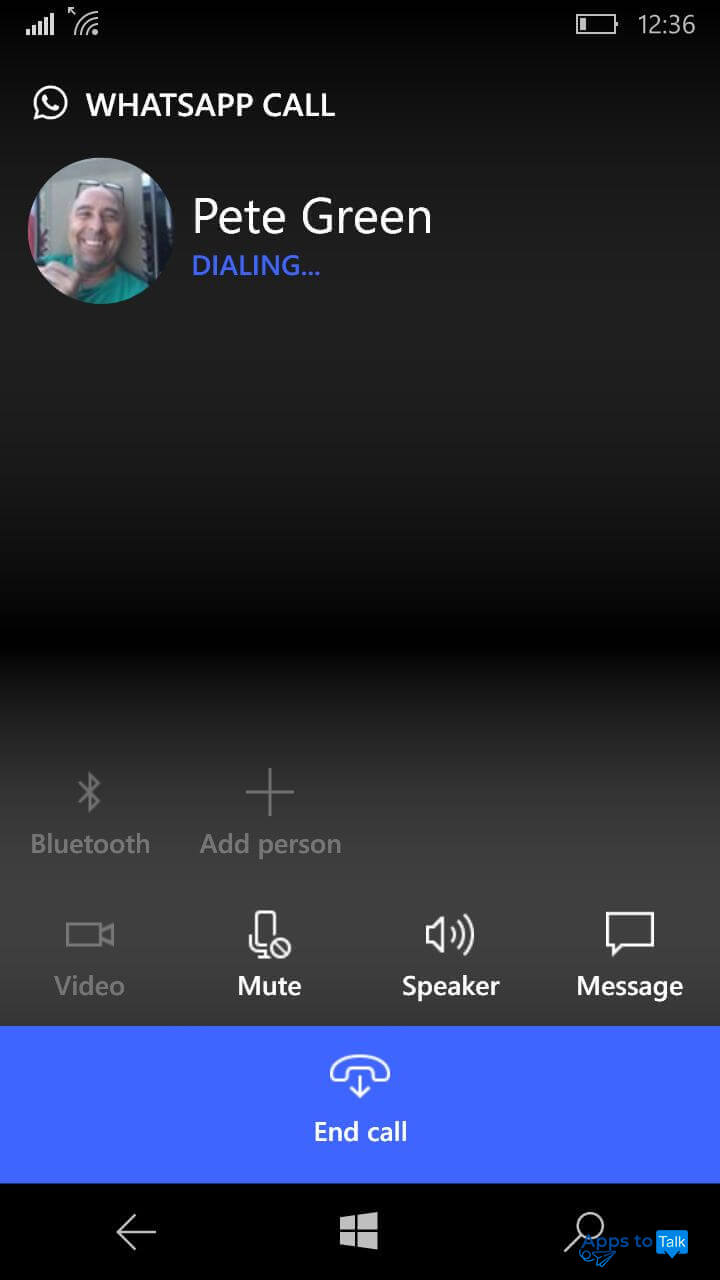
- When the button is clicked, select a contact from the phone book and the media call is started. Wait till the person responds!


Here is an alternate method how to do the same action:
- Open the text chat on WhatsApp from the Chats tab as it was described in the previous section of the article.
- In the chatting form, click the Dial button next to the upper-right corner of the screen.
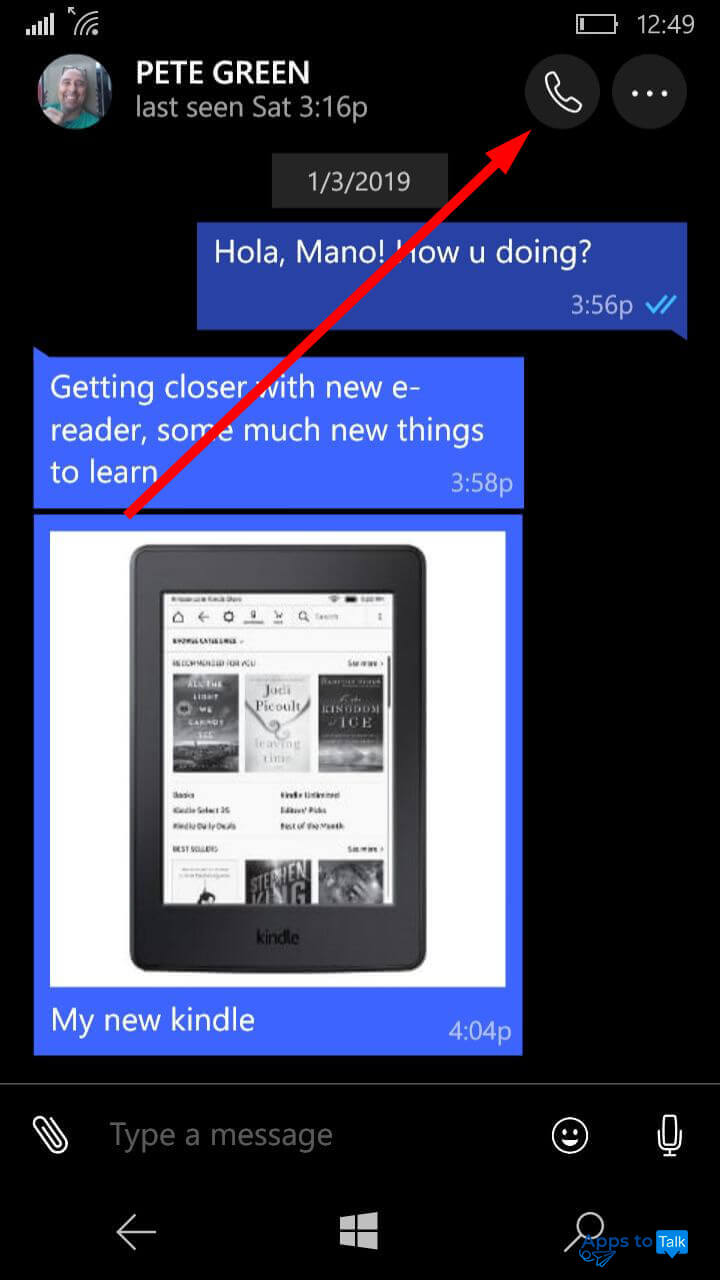
- When the button is clicked, make a selection among a few options: voice or video call. And media connection is on.


As you may have noticed, any of the ways to initiate a voice/video call on WhatsApp are entirely all-sufficient and do not require any advanced skills or knowledge.
How to make a group call on WhatsApp for Windows Phone
Group or conference calls are an essential feature for business which allows to talk to several people simultaneously. This function is irreplaceable if you need to discuss a project, share your ideas regarding this or that matter or pinpoint the disadvantages of the particular option suggested to be implemented between all the team members, for instance. Here is how you can make a group call in the WhatsApp messenger:
- Navigate to Chats tab and click the Group call button on the icon panel at the bottom of the screen.
- When the icon is picked, you can see the entire list of all the contacts stored within the phone book of your mobile device. Select those who you want to participate in the WhatsApp group chat. When the contact is selected, it becomes available in the header of the group so that you can differentiate him in the following way.
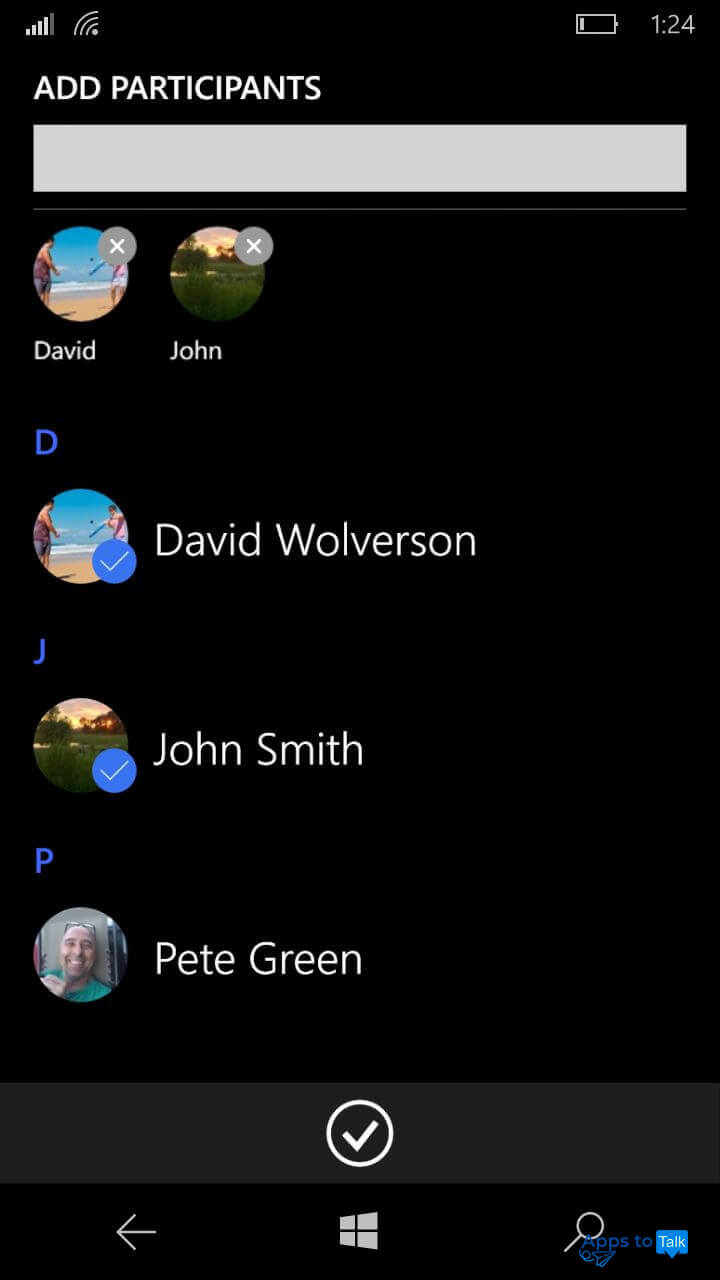
- If the WhatsApp contact list is too large, you can refer to the search field above and start typing the contact names right there. When you start typing, the appropriate filter is applied to the contact list based on your custom parameters. When all of the mentioned is done, tap the Tick button below.

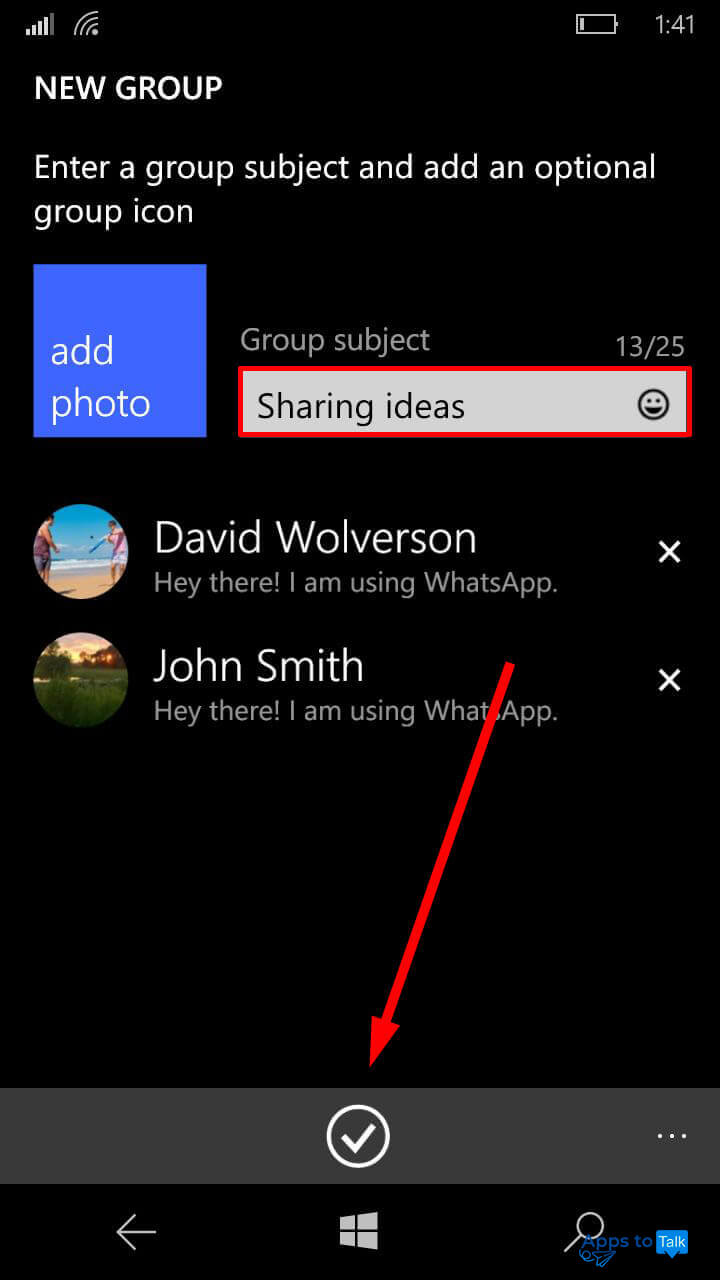
- Next form is designed to summarize the options mentioned above. In the Group subject text field, write the title of the group. Also, there is one more option — the photo of the group (this parameter is optional). In addition, here you can check out the resulted list of the WhatsApp group participants as well as drop someone. When you are done, click the Create button with the tick icon on it.
- The group is created, and you can get start the discussion. After the last step, all the WhatsApp group participants will receive an invite to join the group. Moreover, the whole group conversation is encrypted with end-to-end protocol. Hereby, you can stop worrying about your private safety from Trojans or cyber-hijackers.
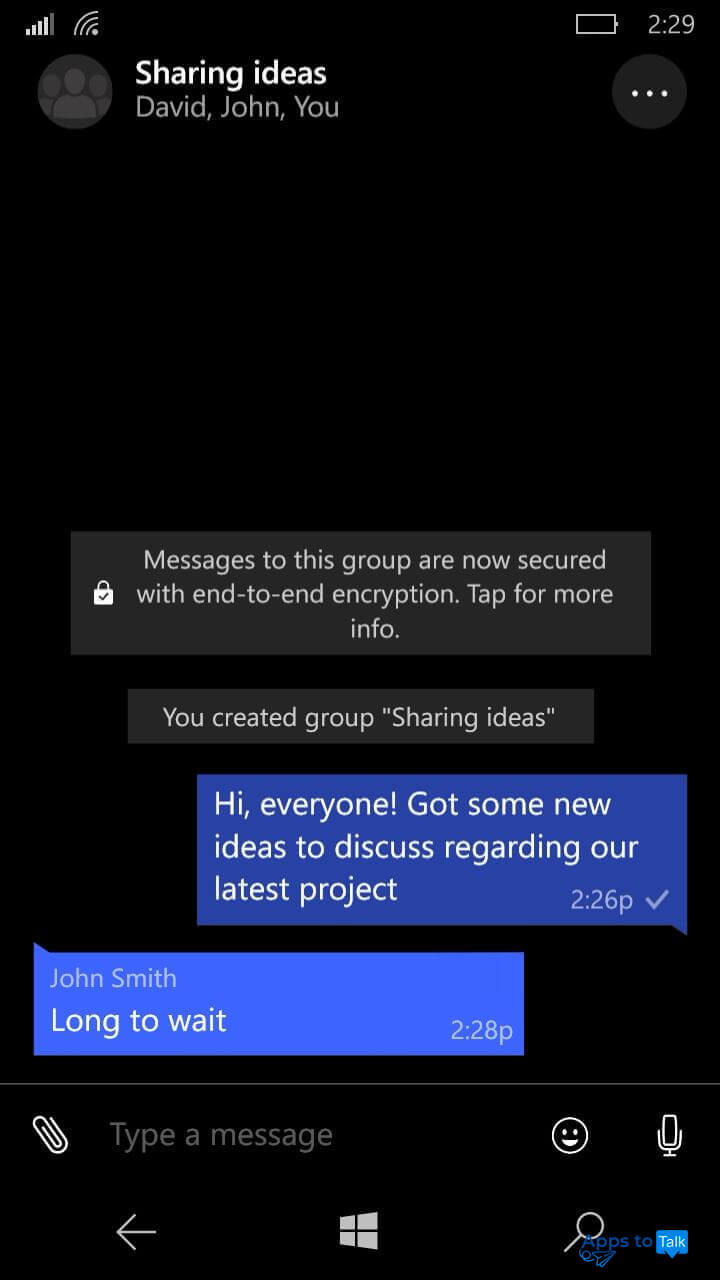


The group chat is a perfect way to discuss any issue remotely, regardless whether it is business or something personal. So, let it remain in your arsenal for long.
If you wish to initiate a group chat in iOS or Android mobile environment, refer to “How to create group chat and calls in WhatsApp” FAQ guide chapter.
How to change the background theme or image of WhatsApp on Windows Phone
There are several ways to change the background color in WhatsApp. Here is the first of them which allows to set up the theme for all the contacts at once as the default scheme:
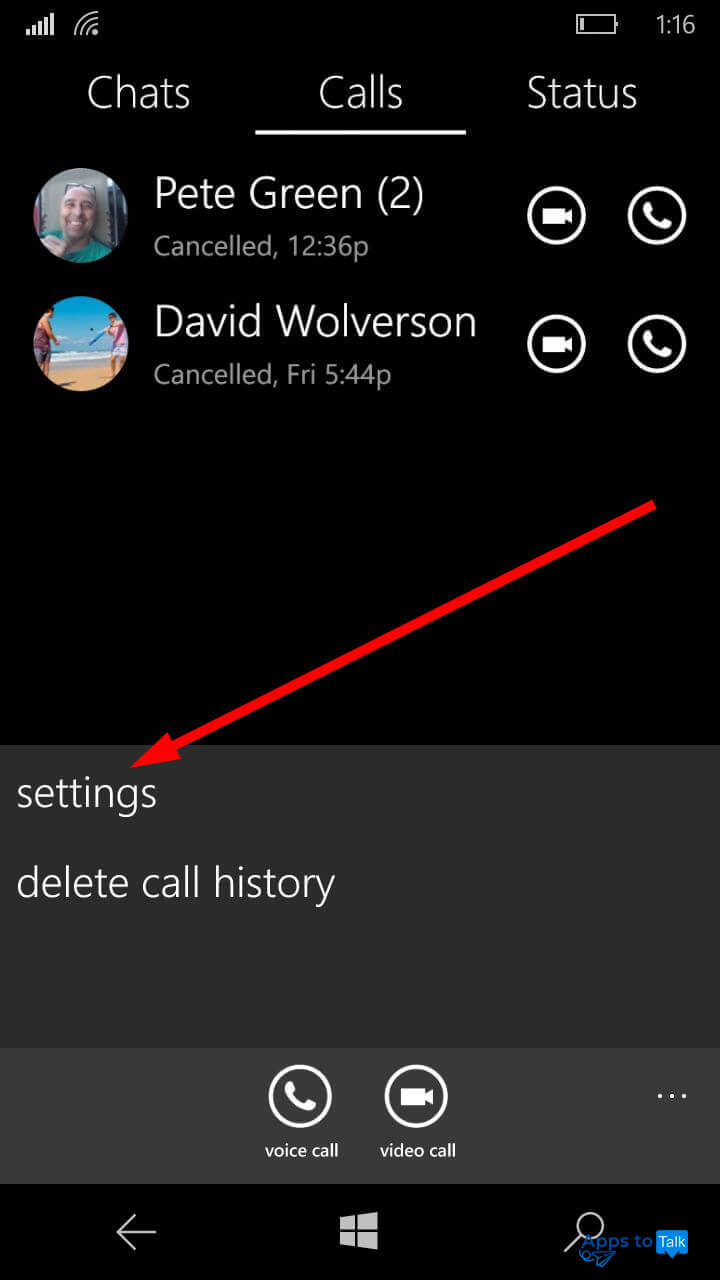
- From the Chats or Calls messenger tab, click on the More button with three horizontal dots at the bottom-right corner of the WhatsApp screen.
- The submenu appears, where you can select the Settings option among the available variants.
- From the Settings menu, pick the Chats and calls section. This particular section allows you to customize several visual components and default graphical theme of your WhatsApp.

- In the Chats and calls submenu, pick Default background item.
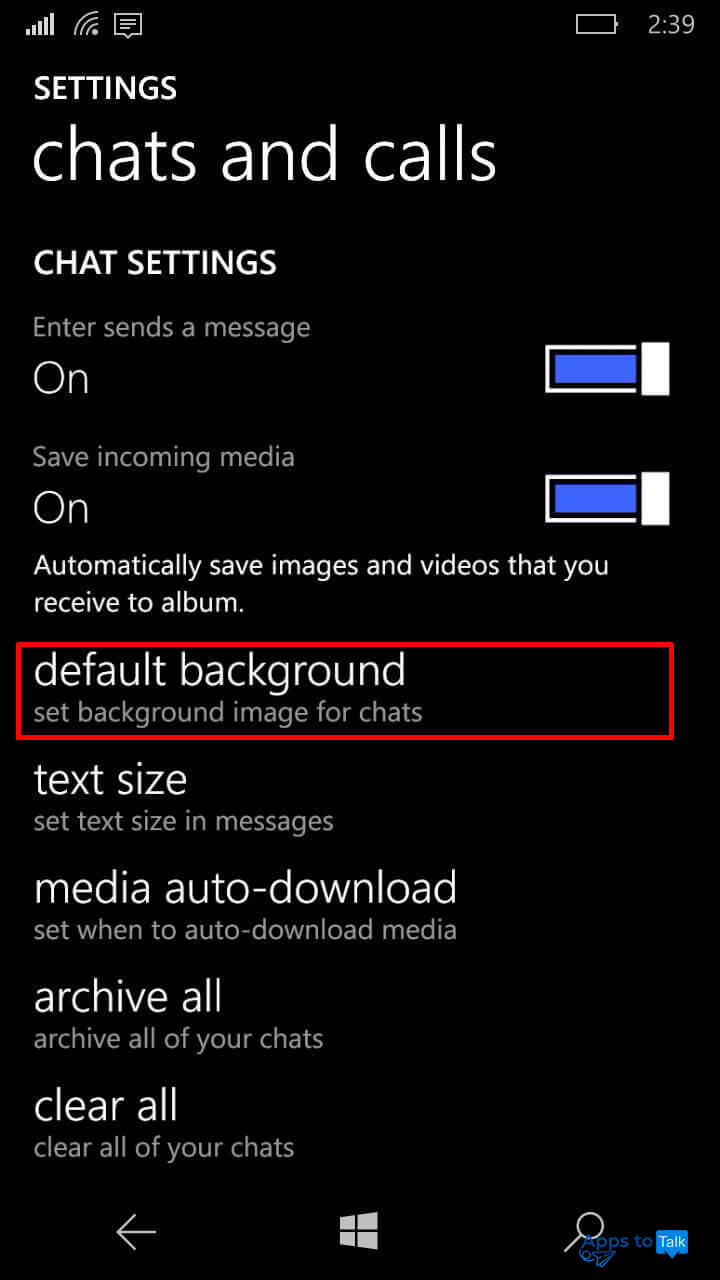
- When the item is revealed, you can select any of the suggested by default WhatsApp visual themes from the gallery folder, choose any of the affordable pictures from the custom album or apply search in the web to find a suitable graphical scheme for your WhatsApp service. Whatever you choose, the ways to customize your messenger GUI are awesome, indeed.


There is an alternative way to set up the custom theme for each WhatsApp contact individually. Here’s how you can do it:
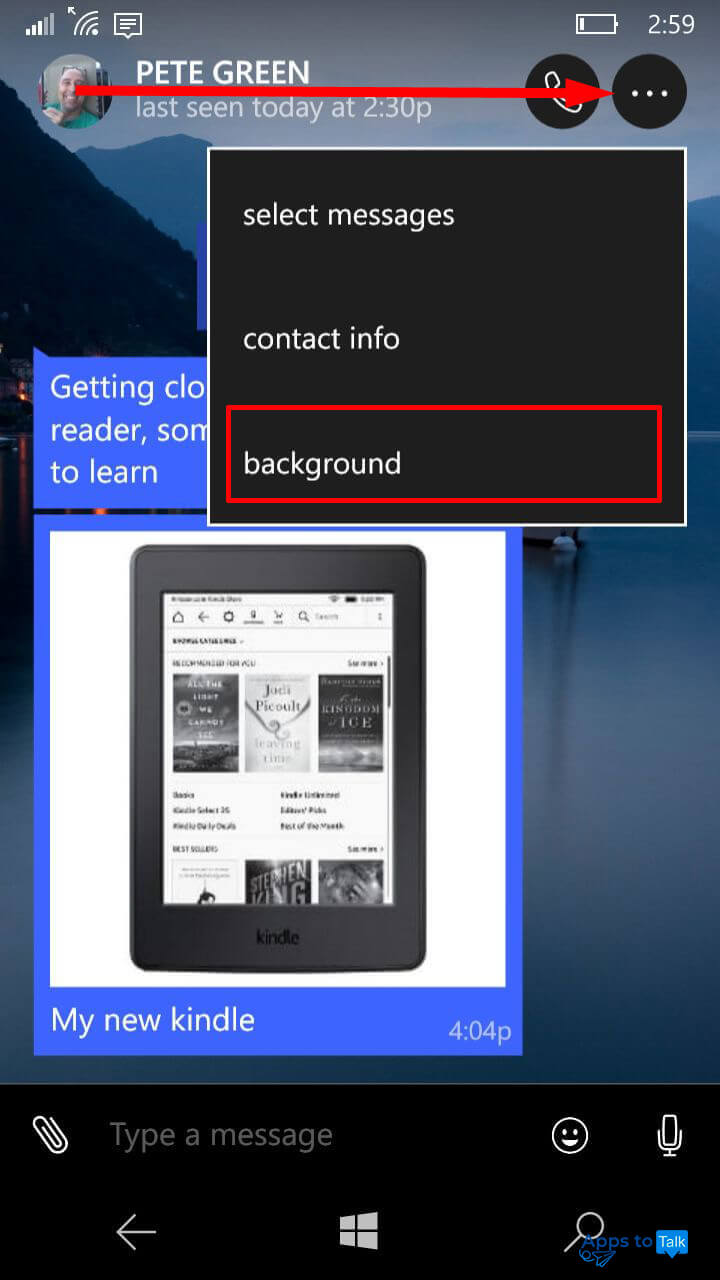
- Open the text chat in WhatsApp with the person you want to set up the theme for.
- Tap the More icon with three horizontal dots on it at the upper right corner and select Background option among the affordable suggestions.
- In the revealed submenu, make a selection from the phone gallery, custom user albums or search for an image in the web.
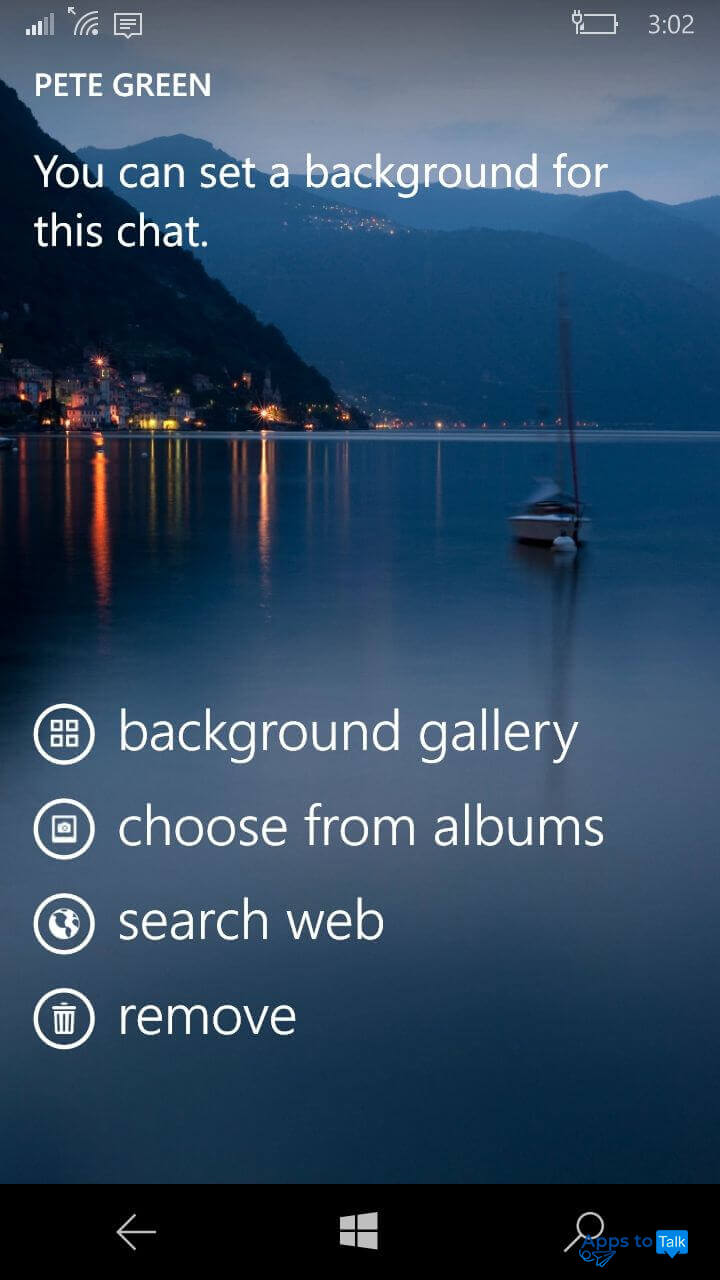


Note: while making a selection from the gallery or an album, you can swipe left or right to view the affordable WhatsApp themes consequently, one after another.
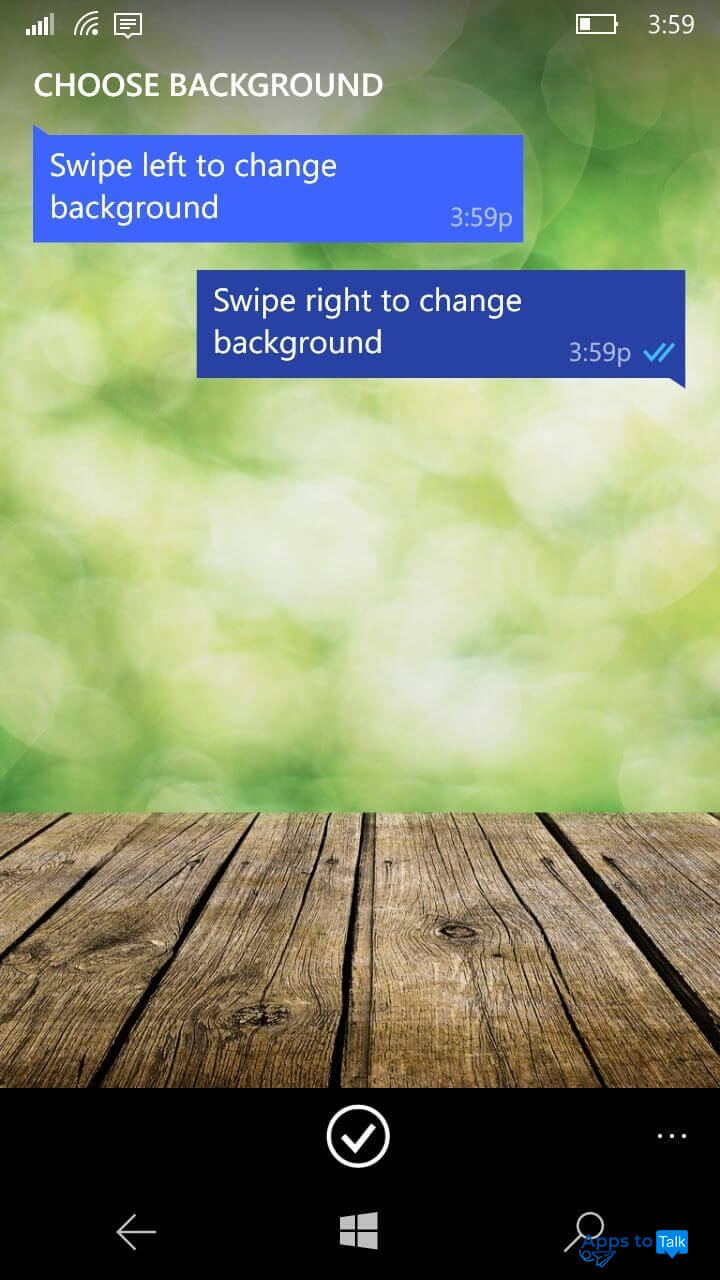
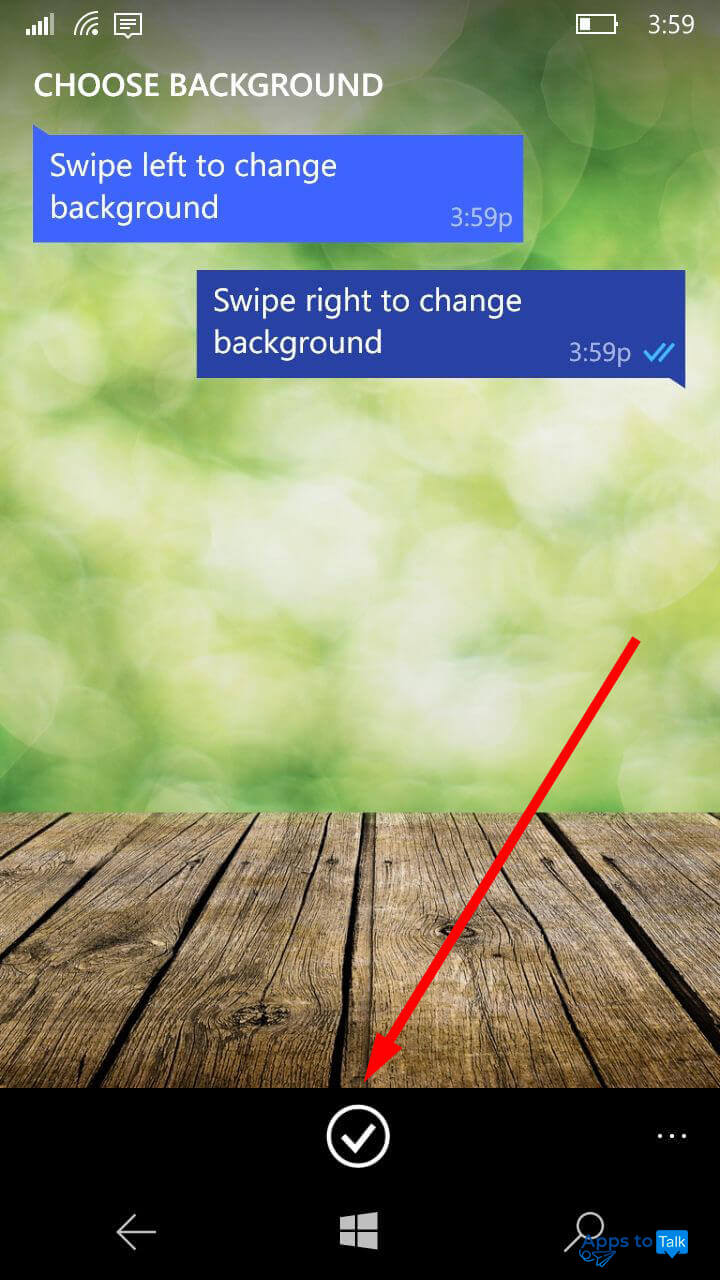
- When the choice is done, click on the Tick icon on the bottom of the display, and your selection will be memorized.

In this user guide we have mentioned only the basic workflows and adjustments which the user is able to perform. The abilities of WhatsApp are much wider than those described above: for instance, you can apply custom adjustments to your profile, back up messages and afterwards restore them, block contacts, manage the statuses, and do a lot of other things that are worth to be mentioned. You can find the step-by-step guides regarding all of these activities in the FAQ.
