


SEXY BACCARAT แหล่งรวมเกมเดิมพัน เจ้าแรกในไทย ตัวเกมทันสมัย
SEXY BACCARAT คือแหล่งรวมเกมเดิมพันออนไลน์ที่เปิดให้บริการในประเทศไทยมานาน พร้อมกับการเป็นผู้นำในด้านการให้บริการ บาคาร่าออนไลน์ ที่มาพร้อมกับตัวเกมที่ทันสมัยและมีคุณภาพสูง ด้วยการพัฒนาเทคโนโลยีใหม่ๆ เพื่อให้ผู้เล่นได้รับประสบการณ์การเดิมพันที่สะดวกและง่ายดายที่สุด โดยไม่ต้องเสียเวลารอนานในการเล่นหรือทำธุรกรรมต่างๆ ตัวเกมของ SEXYBACCARAT ถูกออกแบบมาให้มีความเรียบง่าย แต่ทันสมัย เพื่อให้ผู้เล่นสามารถเข้าถึงได้ทุกคน ไม่ว่าจะเป็นมือใหม่หรือผู้เล่นที่มีประสบการณ์แล้ว โดยมีรูปแบบเกมบาคาร่าให้เลือกเล่นหลากหลาย และรองรับการเล่นผ่านทุกอุปกรณ์ ทั้งคอมพิวเตอร์และมือถือ ทำให้ผู้เล่นสามารถเข้าถึงเกมได้ทุกที่ทุกเวลา
นอกจากความสะดวกในการเล่นแล้ว SEXY BACCARAT ยังมีระบบที่ปลอดภัยและโปร่งใสในการทำธุรกรรม การฝากและถอนเงินสามารถทำได้รวดเร็วโดยไม่มีค่าธรรมเนียมใดๆ ทั้งยังรองรับหลายช่องทางการฝากเงิน เช่น ผ่านธนาคารและระบบกระเป๋าเงินออนไลน์ ซึ่งเพิ่มความสะดวกสบายให้กับผู้เล่นทุกคน ทางเว็บยังมีการออกโปรโมชั่นและข้อเสนอพิเศษมากมาย เช่น โบนัสต้อนรับสำหรับสมาชิกใหม่ และการแจกเครดิตฟรีในช่วงเวลาต่างๆ เพื่อให้ผู้เล่นได้มีทุนในการเล่นเกมมากขึ้น โดยไม่ต้องใช้เงินตัวเองทั้งหมด นอกจากนี้ SEXYBACCARAT ยังให้ความสำคัญกับการให้บริการลูกค้าตลอด 24 ชั่วโมง มีทีมงานพร้อมให้คำแนะนำและแก้ปัญหาทุกข้อสงสัยของผู้เล่นอย่างรวดเร็ว การเลือกเล่นบาคาร่าออนไลน์กับ SEXYBACCARAT จึงเป็นทางเลือกที่ดีสำหรับผู้ที่ต้องการความมั่นคง ปลอดภัย และการบริการที่มีคุณภาพ ด้วยความทันสมัยของระบบเกมและการสนับสนุนที่ดีเยี่ยม ทำให้ SEXYBACCARAT กลายเป็นหนึ่งในเว็บไซต์บาคาร่าที่ได้รับความนิยมมากที่สุดในประเทศไทย
วิธีใช้สูตรบาคาร่า AI ฟรี โปรแกรมการคำนวณที่แม่นที่สุด
วิธีใช้สูตรบาคาร่า AI ให้ได้ผลมากที่สุด
แม้สูตรบาคาร่า AI จะช่วยให้คาดเดาผลลัพธ์ได้แม่นยำ แต่การใช้งานให้ได้ประสิทธิภาพสูงสุดต้องมีเทคนิคเพิ่มเติม ดังนี้
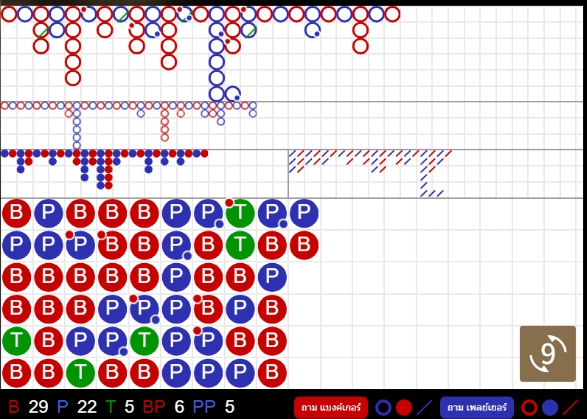
1. เลือกห้องที่มีรูปแบบไพ่ชัดเจน
ควรเลือกห้องบาคาร่าที่มีรูปแบบการออกไพ่ชัดเจน เช่น
- ไพ่มังกร (ออกฝั่งเดียวกันติดกันหลายรอบ)
- ไพ่ปิงปอง (ออกสลับกันระหว่าง Player และ Banker)
หากห้องไหนมีการออกไพ่ที่ไม่เป็นแพทเทิร์น โปรแกรม AI อาจวิเคราะห์ผลได้ยากขึ้น
2. เดิมพันตามสูตรอย่างมีวินัย
เมื่อสูตร AI แนะนำให้แทงฝั่งใด ควรทำตามโดยไม่ลังเล และไม่ควรเล่นสวนสูตรบ่อยเกินไป เพราะจะลดโอกาสชนะของตัวเอง
3. ใช้สูตรร่วมกับเทคนิคเดินเงิน
แม้ว่าสูตร AI จะช่วยคำนวณผลได้ดี แต่การใช้สูตรเดินเงินควบคู่กันไปจะช่วยลดความเสี่ยงได้ เช่น
- สูตรมาร์ติงเกล (Martingale) – เพิ่มเงินเดิมพันเป็นสองเท่าหากแพ้
- สูตร 1324 – วางเดิมพันตามลำดับ 1-3-2-4 เพื่อลดความเสี่ยง
- สูตรฟีโบนักชี (Fibonacci) – เพิ่มเงินเดิมพันตามลำดับตัวเลขเพื่อรักษาสมดุลของทุน
4. ตั้งเป้าหมายกำไรและขาดทุน
ควรกำหนดว่าในแต่ละวันต้องการกำไรเท่าไร และขาดทุนได้เท่าไร หากถึงเป้าหมายแล้วควรหยุดเล่น เพื่อป้องกันการเสียเงินมากเกินไป
5. ทดลองใช้สูตรก่อนเล่นจริง
ควรทดลองใช้ สูตรบาคาร่า AI ในโหมด ทดลองเล่นบาคาร่า ก่อนเพื่อดูว่าความแม่นยำของสูตรเป็นอย่างไร ก่อนนำไปใช้กับการเดิมพันจริง
การเปรียบเทียบสูตรบาคาร่า AI กับการเล่นแบบเดิม
| คุณสมบัติ | เล่นเองแบบปกติ | ใช้สูตรบาคาร่า AI |
|---|---|---|
| วิธีการวางเดิมพัน | อาศัยดวงและการคาดเดา | ใช้ระบบ AI วิเคราะห์ผลลัพธ์ |
| ความแม่นยำ | 50-60% | มากกว่า 90% |
| ความเสี่ยง | สูง | ควบคุมความเสี่ยงได้ดีขึ้น |
| การใช้เทคนิคเดินเงิน | อาจไม่มีแบบแผน | ใช้ควบคู่กับสูตรเดินเงินได้ |
| เหมาะสำหรับผู้เล่น | ทุกระดับ | เหมาะกับมือใหม่และมืออาชีพ |


ทำความรู้จักกับ "SEXY BACCARAT" บาคาร่ายอดนิยม ที่กำลังได้รับความสนใจ
SEXY BACCARAT คือหนึ่งในเว็บไซต์บาคาร่าที่ได้รับความนิยมอย่างสูงในประเทศไทย โดยมีกลุ่มผู้เล่นที่หลากหลายทั้งมือใหม่และมืออาชีพ ด้วยความโดดเด่นในเรื่องของการให้บริการเกมบาคาร่าออนไลน์ที่มีคุณภาพและการพัฒนาเทคโนโลยีใหม่ๆ ที่รองรับความต้องการของผู้เล่นได้อย่างครบถ้วน SEXYBACCARAT มุ่งเน้นการให้บริการที่มีความโปร่งใสและปลอดภัย ทำให้ผู้เล่นมั่นใจในทุกการลงทุนและการทำธุรกรรมต่างๆ บนแพลตฟอร์ม เว็บไซต์นี้มีการนำเสนอเกมบาคาร่าหลายรูปแบบ ทั้งบาคาร่าแบบมาตรฐานและบาคาร่าแบบพิเศษที่สามารถเลือกเล่นได้ตามความชอบของผู้เล่น นอกจากนี้ยังมีโต๊ะบาคาร่าที่ให้บริการในหลายห้อง พร้อมกับดีลเลอร์สาวสวยที่คอยให้บริการตลอดเวลา การเลือกโต๊ะเล่นก็ง่ายและสะดวก สามารถเปลี่ยนห้องหรือโต๊ะได้ตามต้องการ โดยไม่ต้องรอนาน
SEXY BACCARAT ยังมีการรองรับการเล่นผ่านอุปกรณ์ทุกชนิด ทั้งคอมพิวเตอร์และมือถือ ทำให้ผู้เล่นสามารถเข้าเล่นได้ทุกที่ทุกเวลา ไม่ว่าจะอยู่ที่ไหนก็สามารถสนุกกับการเล่นบาคาร่าได้อย่างสะดวกสบาย นอกจากนี้ยังมีระบบฝากถอนที่รวดเร็วและปลอดภัย รองรับการทำธุรกรรมผ่านธนาคารชั้นนำและกระเป๋าเงินออนไลน์ต่างๆ ซึ่งช่วยให้ผู้เล่นไม่ต้องกังวลเรื่องการฝากหรือถอนเงิน สิ่งที่ทำให้ SEXYBACCARAT โดดเด่นคือการมีโปรโมชั่นและข้อเสนอพิเศษมากมาย ที่สามารถตอบสนองความต้องการของผู้เล่นได้อย่างดีเยี่ยม เช่น โบนัสสำหรับสมาชิกใหม่ โปรโมชั่นฝากเงิน และการแจกเครดิตฟรีที่สามารถนำไปใช้ในการเล่นเกมต่างๆ โดยไม่ต้องเสี่ยงกับเงินทุนส่วนตัว การให้บริการที่มีคุณภาพ ระบบที่ทันสมัย และความปลอดภัยที่เหนือชั้น ทำให้ SEXYBACCARAT เป็นตัวเลือกที่น่าสนใจสำหรับผู้ที่ชื่นชอบการเล่นบาคาร่าออนไลน์ หากคุณกำลังมองหาเว็บไซต์ที่สามารถให้ความคุ้มค่ากับการเดิมพัน การเลือก SEXYBACCARAT จะเป็นทางเลือกที่ไม่ทำให้ผิดหวัง
ข้อดีของบาคาร่าเว็บตรง
ความปลอดภัยในการทำธุรกรรม
บาคาร่าเว็บตรงให้ความสำคัญกับความปลอดภัยของข้อมูลและการทำธุรกรรมทางการเงินเป็นอย่างมาก โดยไม่ต้องผ่านตัวกลางหรือเอเย่นต์ ทำให้ผู้เล่นมั่นใจได้ว่าข้อมูลส่วนตัวและเงินทุนจะได้รับการดูแลรักษาอย่างเข้มงวด โดยการใช้ระบบการเข้ารหัสขั้นสูงในการปกป้องข้อมูลส่วนบุคคลและการทำธุรกรรมทั้งหมดการถอนเงินที่รวดเร็วและไม่มีค่าธรรมเนียม
เว็บตรงมักจะมีระบบการถอนเงินที่สะดวกและรวดเร็ว สามารถถอนเงินได้โดยตรงจากบัญชีผู้เล่นโดยไม่ต้องผ่านเอเย่นต์หรือบุคคลกลาง จึงไม่ต้องเสี่ยงกับการเกิดปัญหาการชักช้าหรือการหักค่าธรรมเนียม ซึ่งทำให้ผู้เล่นสามารถเข้าถึงกำไรได้อย่างรวดเร็วและเต็มจำนวนอัตราการจ่ายที่โปร่งใสและเป็นธรรม
การเล่นบาคาร่าเว็บตรงมีความโปร่งใสในเรื่องของอัตราการจ่ายและผลการเดิมพัน เนื่องจากไม่ต้องผ่านเอเย่นต์ ระบบการจ่ายเงินจะตรงไปตรงมาและเป็นธรรม ทำให้ผู้เล่นไม่ต้องกังวลเรื่องการถูกหักค่าคอมมิชชั่นหรือการปรับอัตราจ่ายที่ไม่เป็นธรรมโปรโมชั่นและโบนัสที่คุ้มค่า
เว็บตรงมักจะมีการจัดโปรโมชั่นที่หลากหลายและคุ้มค่ามากกว่าที่คุณจะพบในเว็บที่ต้องผ่านเอเย่นต์ เช่น โบนัสต้อนรับสำหรับสมาชิกใหม่, โบนัสฝากเงิน และโปรโมชั่นฟรีสปิน หรือเครดิตฟรี ที่สามารถใช้เพิ่มโอกาสในการชนะเกมโดยไม่ต้องใช้เงินทุนตัวเองทั้งหมดความสะดวกสบายในการเข้าถึงเกม
การเล่นผ่านเว็บตรงทำให้ผู้เล่นสามารถเข้าเล่นเกมได้ทุกที่ทุกเวลาผ่านอุปกรณ์ต่างๆ ไม่ว่าจะเป็นคอมพิวเตอร์, สมาร์ตโฟน หรือแท็บเล็ต ทำให้การเข้าเล่นบาคาร่าเป็นเรื่องง่ายและสะดวก ไม่ต้องพึ่งพาแอปพลิเคชันหรือตัวกลางอื่นๆ ที่อาจทำให้เกิดปัญหาความช้าในการเข้าถึงระบบบริการลูกค้า 24 ชั่วโมง
เว็บตรงมีการบริการลูกค้าอย่างมืออาชีพตลอด 24 ชั่วโมง ไม่ว่าจะเป็นการตอบข้อสงสัย การแก้ปัญหาต่างๆ หรือการช่วยเหลือเรื่องการฝากถอน ทีมงานสามารถให้ความช่วยเหลือได้อย่างรวดเร็วและมีประสิทธิภาพ ผู้เล่นจึงมั่นใจได้ว่าไม่ต้องรอนานเมื่อเกิดปัญหาตัวเลือกเกมที่หลากหลาย
บาคาร่าเว็บตรงมักจะมีตัวเลือกเกมที่หลากหลายไม่ว่าจะเป็นรูปแบบการเล่นบาคาร่าแบบดั้งเดิม, บาคาร่าความเร็ว, หรือบาคาร่าแบบสด ซึ่งช่วยให้ผู้เล่นสามารถเลือกเล่นเกมที่เหมาะสมกับความชอบและสไตล์การเล่นของตนเองได้อย่างง่ายดายไม่มีการโกงหรือความเสี่ยงจากเอเย่นต์
การเล่นบาคาร่าเว็บตรงช่วยลดความเสี่ยงที่เกิดจากการโกงหรือการทุจริตจากเอเย่นต์ เพราะการเล่นเกมจะเกิดขึ้นโดยตรงจากระบบของเว็บ ไม่มีการผ่านตัวกลางที่จะทำให้เกิดความเสี่ยงในการคำนวณผลการเดิมพันหรือการจ่ายเงินที่ไม่เป็นธรรม
ข้อเสียของบาคาร่าเว็บตรง
1. มีจำนวนโต๊ะบาคาร่าให้เลือกจำกัดในบางช่วงเวลา
แม้ว่า Sexy Gaming จะมีโต๊ะบาคาร่าหลายโต๊ะ แต่ในบางช่วงเวลาที่มีผู้เล่นจำนวนมาก เช่น เวลาช่วงเย็นหรือวันหยุด โต๊ะเดิมพันบางโต๊ะอาจเต็มอย่างรวดเร็ว ทำให้ผู้เล่นต้องรอคิวหรือเลือกโต๊ะอื่นที่อาจมีขั้นต่ำการเดิมพันสูงกว่าที่ต้องการ
2. ไม่รองรับสกุลเงินดิจิทัล (Cryptocurrency)
Sexy Gaming ยังไม่รองรับการทำธุรกรรมผ่านสกุลเงินดิจิทัล เช่น Bitcoin, USDT หรือ Ethereum ซึ่งอาจเป็นข้อจำกัดสำหรับผู้เล่นที่ต้องการใช้คริปโตในการฝาก-ถอนเงิน โดยระบบการชำระเงินยังคงรองรับเฉพาะบัญชีธนาคารและวอลเล็ตเป็นหลัก
3. บางประเทศไม่สามารถเข้าใช้งานได้
แม้ว่า Sexy Gaming จะเป็นค่ายเกมที่ได้รับความนิยมทั่วโลก แต่ในบางประเทศอาจมีข้อจำกัดทางกฎหมายเกี่ยวกับการพนันออนไลน์ ทำให้ผู้เล่นบางกลุ่มไม่สามารถเข้าใช้งานแพลตฟอร์มนี้ได้โดยตรง และอาจต้องใช้ VPN หรือวิธีการอื่นเพื่อเข้าถึงเว็บไซต์
4. ไม่มีโหมดทดลองเล่นฟรีสำหรับบาคาร่าถ่ายทอดสด
Sexy Gaming ไม่รองรับการทดลองเล่นฟรีสำหรับเกมบาคาร่าแบบถ่ายทอดสด ซึ่งแตกต่างจากเกมสล็อตที่สามารถเล่นโหมดเดโม่ได้ ผู้เล่นใหม่ที่ต้องการฝึกฝนหรือทดสอบระบบจึงจำเป็นต้องใช้เงินจริงในการเริ่มต้นเดิมพัน
5. มีค่าธรรมเนียมบางรายการในการถอนเงิน
แม้ว่าระบบการฝากเงินของ Sexy Gaming จะไม่มีค่าธรรมเนียม แต่ในบางกรณี การถอนเงินอาจมีค่าธรรมเนียม โดยเฉพาะหากมีการถอนเงินจำนวนมากหรือต้องการถอนเงินหลายครั้งในวันเดียวกัน ดังนั้นผู้เล่นควรตรวจสอบเงื่อนไขการถอนเงินให้ชัดเจนก่อนทำรายการ
6. โปรโมชั่นมีเงื่อนไขเทิร์นโอเวอร์ที่ค่อนข้างสูง
แม้ว่า Sexy Gaming จะมีโปรโมชั่นแจกโบนัสต่างๆ แต่เงื่อนไขในการทำเทิร์นโอเวอร์ก่อนถอนเงินอาจค่อนข้างสูงสำหรับบางโปรโมชั่น ทำให้ผู้เล่นต้องวางแผนการเดิมพันให้ดีและพิจารณาว่าจะเลือกรับโบนัสหรือไม่
7. ไม่มีแอปพลิเคชันสำหรับมือถือโดยเฉพาะ
Sexy Gaming รองรับการเล่นผ่านเบราว์เซอร์บนมือถือ แต่ยังไม่มีแอปพลิเคชันเฉพาะสำหรับ iOS และ Android ทำให้บางครั้งผู้เล่นอาจพบปัญหาการโหลดหน้าเว็บช้า หรือการใช้งานบางฟีเจอร์อาจไม่สะดวกเท่ากับแอปพลิเคชันโดยตรง
8. มีเวลาปิดปรับปรุงระบบเป็นระยะ
ในบางช่วงเวลา Sexy Gaming อาจมีการปิดปรับปรุงระบบเพื่อเพิ่มประสิทธิภาพ ซึ่งอาจส่งผลให้ผู้เล่นไม่สามารถเข้าใช้งานได้ชั่วคราว แม้ว่าจะมีการแจ้งเตือนล่วงหน้า แต่ก็อาจเป็นอุปสรรคสำหรับผู้ที่ต้องการเล่นเกมในช่วงเวลานั้น
สมัครเข้าร่วมเดิมพันกับ SEXY BACCARAT บาคาร่าออนไลน์
SexyBaccarat เป็นหนึ่งในผู้ให้บริการบาคาร่าออนไลน์ที่ได้รับความนิยมสูง เปิดโอกาสให้ผู้เล่นได้เข้าร่วมเดิมพันกับเกมที่มีมาตรฐานระดับสากล ระบบถ่ายทอดสดที่เสถียร และรองรับการเดิมพันจากผู้เล่นทุกระดับ ไม่ว่าจะเป็นมือใหม่หรือผู้ที่มีประสบการณ์ สมัครสมาชิกวันนี้สามารถเริ่มต้นเล่นได้ทันที พร้อมรับสิทธิประโยชน์มากมายจากโปรโมชั่นที่คุ้มค่า
ขั้นตอนการสมัครสมาชิก
SexyBaccarat
เข้าสู่เว็บไซต์ – ไปที่เว็บไซต์ของ SexyBaccarat หรือเว็บตัวแทนที่ได้รับอนุญาตเพื่อทำการสมัคร
กดปุ่มสมัครสมาชิก – เลือกเมนูสมัครสมาชิกเพื่อเข้าสู่หน้ากรอกข้อมูล
กรอกข้อมูลส่วนตัว – ใส่ข้อมูลที่จำเป็น เช่น ชื่อ-นามสกุล เบอร์โทรศัพท์ และบัญชีธนาคารที่ใช้สำหรับฝาก-ถอนเงิน
ตั้งค่าบัญชีผู้ใช้ – กำหนดชื่อผู้ใช้ (Username) และรหัสผ่านที่ปลอดภัย
ยืนยันข้อมูล – ตรวจสอบความถูกต้องของข้อมูลทั้งหมดก่อนกดปุ่มยืนยัน
ฝากเงินเข้าระบบ – โอนเงินเข้าบัญชีที่กำหนดเพื่อเริ่มต้นเดิมพัน โดยสามารถเลือกจำนวนเงินที่ต้องการฝากตามงบประมาณ
เริ่มต้นเล่นบาคาร่าออนไลน์ – เมื่อยอดเงินเข้าระบบ สามารถเลือกโต๊ะเดิมพันและเริ่มเล่นได้ทันที

สามารถเล่น SEXY BACCARAT ผ่านอุปกรณ์ใดได้บ้าง?
ผู้เล่นสามารถเข้าใช้งาน SEXYBACCARAT ได้จากทุกอุปกรณ์ ไม่ว่าจะเป็นคอมพิวเตอร์ โทรศัพท์มือถือ หรือแท็บเล็ต รองรับทั้งระบบ iOS และ Android โดยไม่ต้องดาวน์โหลดแอปพลิเคชัน สามารถเล่นผ่านเว็บเบราว์เซอร์ได้ทันที
มีโปรโมชั่นหรือโบนัสอะไรให้สมาชิกบ้าง?
SEXYBACCARAT มีโปรโมชั่นและโบนัสมากมายสำหรับสมาชิกใหม่และสมาชิกปัจจุบัน เช่น โบนัสฝากเงินครั้งแรก โปรโมชั่นคืนยอดเสีย และกิจกรรมแจกเครดิตสำหรับผู้เล่นที่ทำตามเงื่อนไข
ฝาก-ถอนเงินใช้เวลานานแค่ไหน?
ระบบฝาก-ถอนเงินของ SEXYBACCARAT เป็นระบบอัตโนมัติที่สามารถดำเนินการได้อย่างรวดเร็ว ใช้เวลาเพียงไม่กี่วินาที รองรับการทำธุรกรรมตลอด 24 ชั่วโมง
SEXYBACCARAT มีความปลอดภัยหรือไม่?
SEXYBACCARAT เป็นค่ายเกมที่ได้รับการรับรองจากหน่วยงานที่เกี่ยวข้อง มีระบบรักษาความปลอดภัยสูง และใช้เทคโนโลยีที่ช่วยปกป้องข้อมูลของผู้เล่นให้ปลอดภัยตลอดการใช้งาน
การสมัครสมาชิกใช้เวลากี่นาที?
การสมัครสมาชิกกับ SEXYBACCARAT ใช้เวลาเพียงไม่กี่นาทีเท่านั้น เพียงกรอกข้อมูลที่จำเป็น ยืนยันตัวตน และฝากเงินเข้าระบบ ก็สามารถเริ่มต้นเดิมพันได้ทันที